Hello. Welcome to my blog! Today, I’m going to show you how I make these cute faux leather bows.
I first started making these bows about three years ago, in 2020 and the reason was. Originally I wanted to make those big ribbon bows that other sellers have, but I was having a hard time trying to get my designs to look good in ribbon. Then I saw paper bows and I thought, what if I made them with leather so it’s more durable and stiff enough to be painted on.
WHAT YOU NEED
These bows are actually simple to make. The first thing you need is the faux leather which is better sold by the yard. Originally, I was purchasing the leather from an Etsy seller, but I ran into a problem with consistency. I had ordered one yard of each color to start, but one day I ran out of red and when I ordered more, the new shipment was a much brighter red and I couldn’t use it for some of the designs because the color didn’t match. Then my mom found a vendor that I switched to and luckily they had both shades of red.
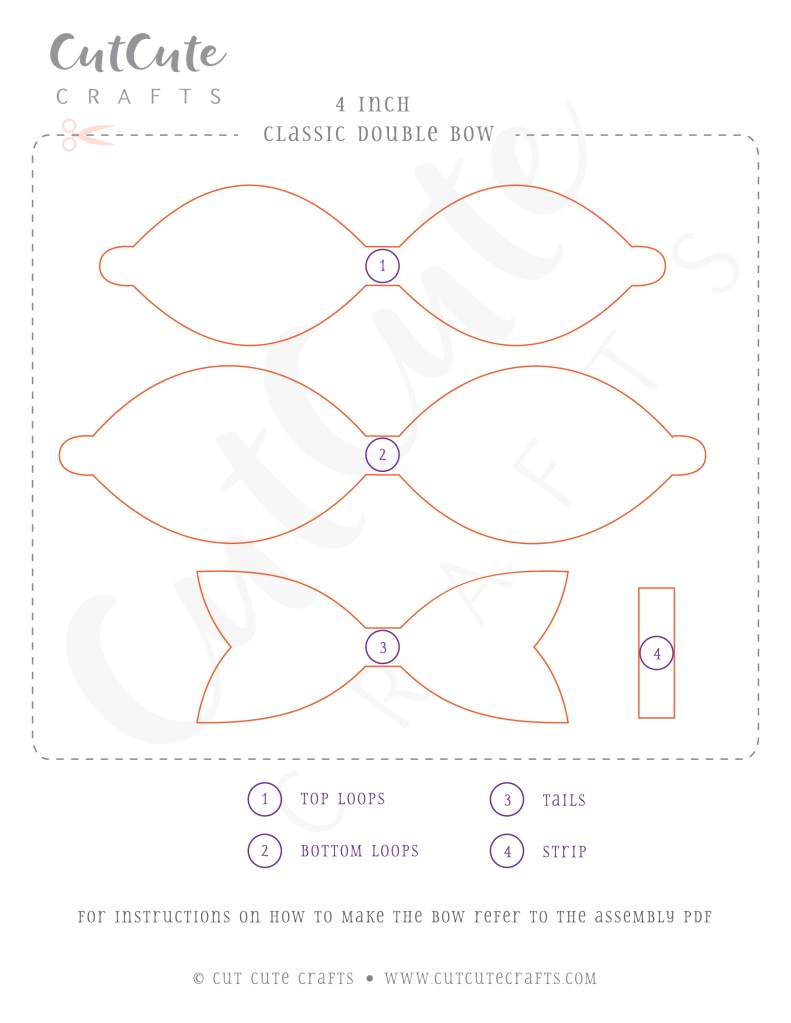
The bows consist of a total of four pieces. The back piece, the center bow, the top bow, and the center strip that keeps it all together.
THREE CUTTING METHODS
METHOD 1: TRACING BY HAND
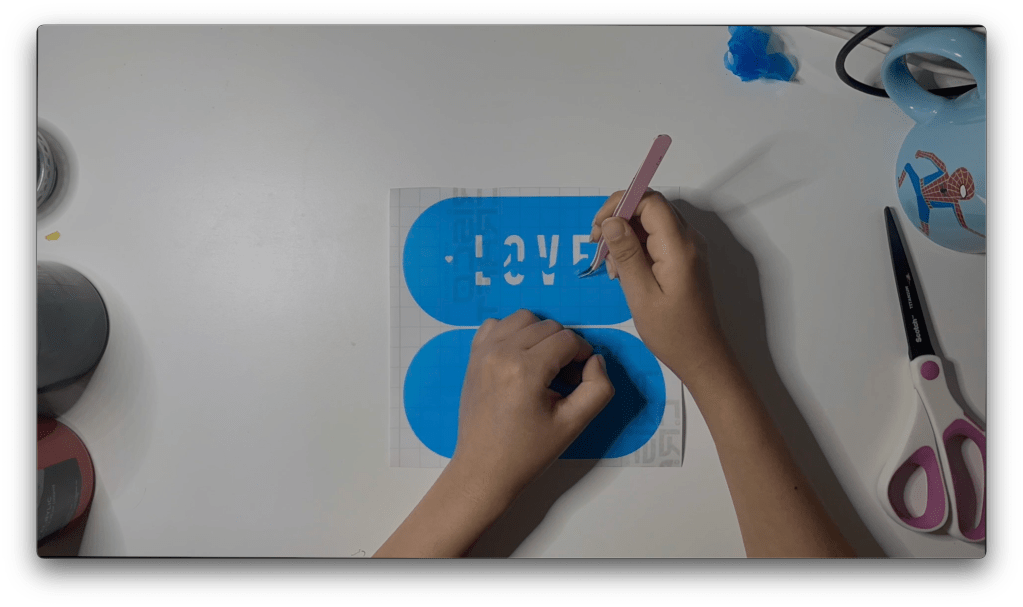
There are three methods of cutting the pieces. The first one is what I originally did when I first started, which is to use a paper stencil. I purchased the bow template from an Etsy seller and printed it on cardstock, then cut out the shapes. Then using the stencils trace the shape onto the back of the material and cut them out. This is the method to use if you can’t afford the equipment to speed things up. If you’re doing this, I recommend using a felt tip pen because if you use a ballpoint or marker, even though the marks are on the back of the material, the ink still bleeds through and stains the edges after you cut them. With a felt tip pen, I’ve never had this issue.
METHOD 2: USING A LEATHER CUTTER
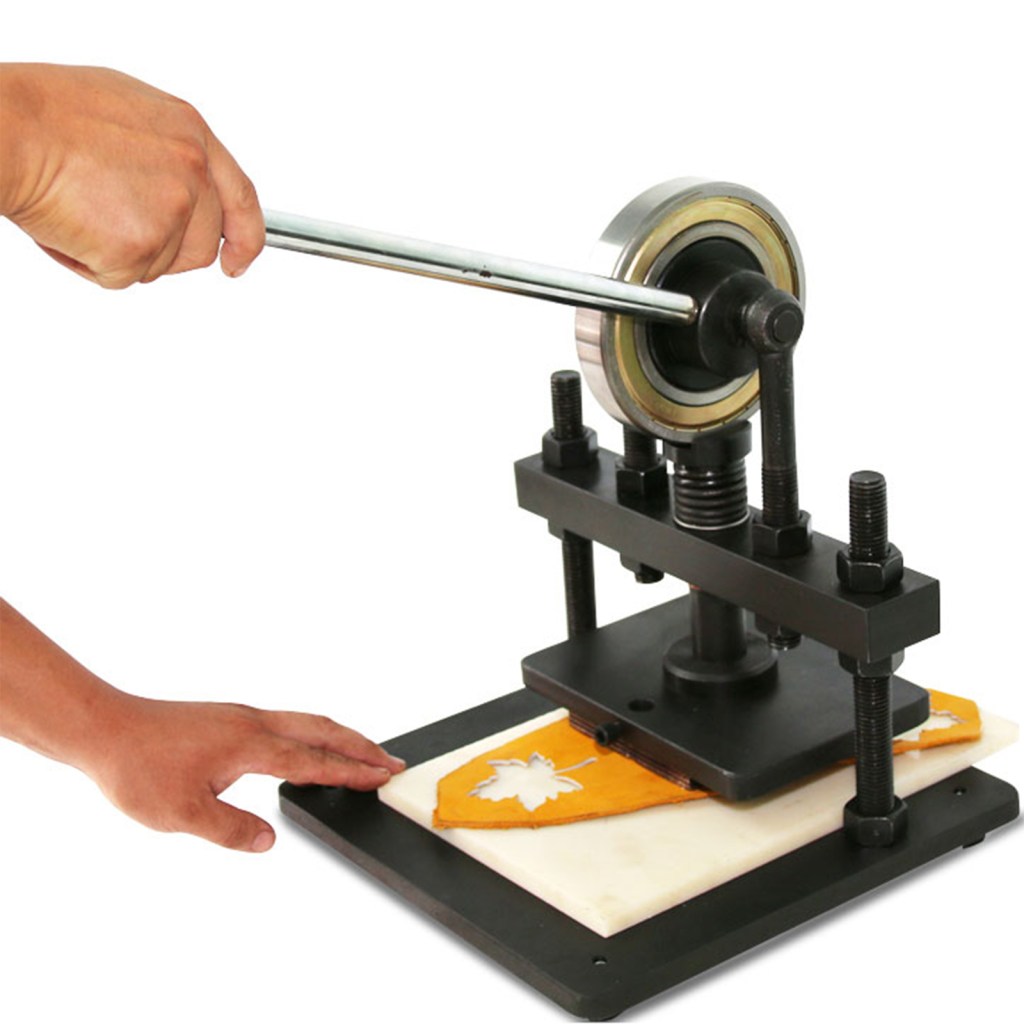
The second method is to use a leather press. A leather press is this heavy duty press that is used to punch out the shapes. It uses these leather cutters which you can find from online sellers, or order them custom made like I did. What you do is first cut the leather into rectangles big enough for the shape, then you place the sheet on top of the cutter and slide it under, then punch out the shape. I would say this method is much faster than tracing because drawing straight lines is faster than tracing the stencil over and over. It also leads to much smoother cuts.
Unfortunately, the issue I did run into was that I couldn’t get it to completely cut the piece cleanly. The cutters weren’t flat, so I would have to punch it, then very carefully slide the cutter forward and punch it again, but sometimes the leather would stick or shift. So most of the time I would just cut what was left with scissors. This method is faster, and you do get less from the material but not enough to really impact the cost per bow.
METHOD 3: USING A CUTTING MACHINE

The third method is what I currently use, and it is to use a cutting machine. I own a cricut explore air two. For this, I took my stencil and converted it into an svg cutting file on convertio. What I love about this is I’m able to create custom shapes depending on the bow I’m making. For example, for my mickey bow, I made a mickey ear back piece instead of the standard shape.
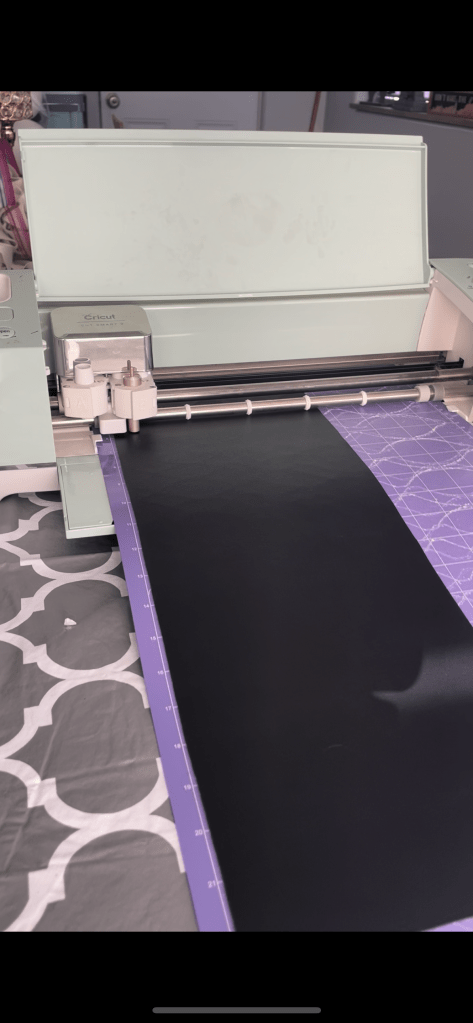
For this, I see how many of each shape fits on a 12×24 cutting mat, then I cut the leather into the correct size sheets. Then place the material face up on a strong grip mat. Two things are very important here. The first is you must use a strong grip mat otherwise the material will slide. The second thing is make sure you place the fabric side of the leather directly on the mat. Unfortunately it will make your mat wear faster, but if you put the leather side down, the glue will come off and ruin your mat along with leading to extra work cleaning off the glue from the cut pieces. I cut my leather on the bonded fabric setting on regular depth and it cuts it almost perfectly, with only a few strings left attached that I have to cut.
TWO WAYS TO DECORATE
METHOD 1: PAINTING
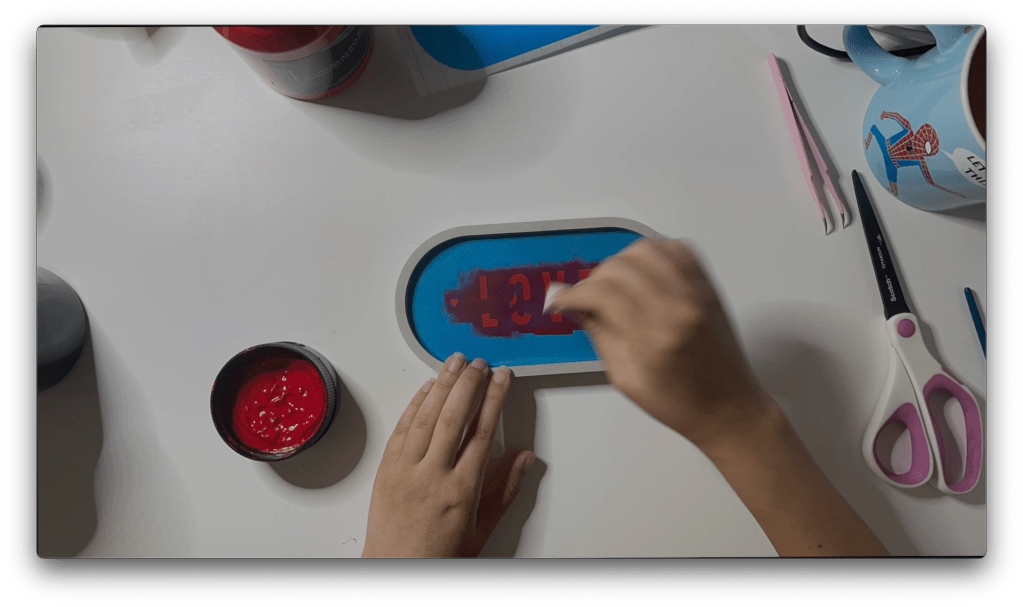
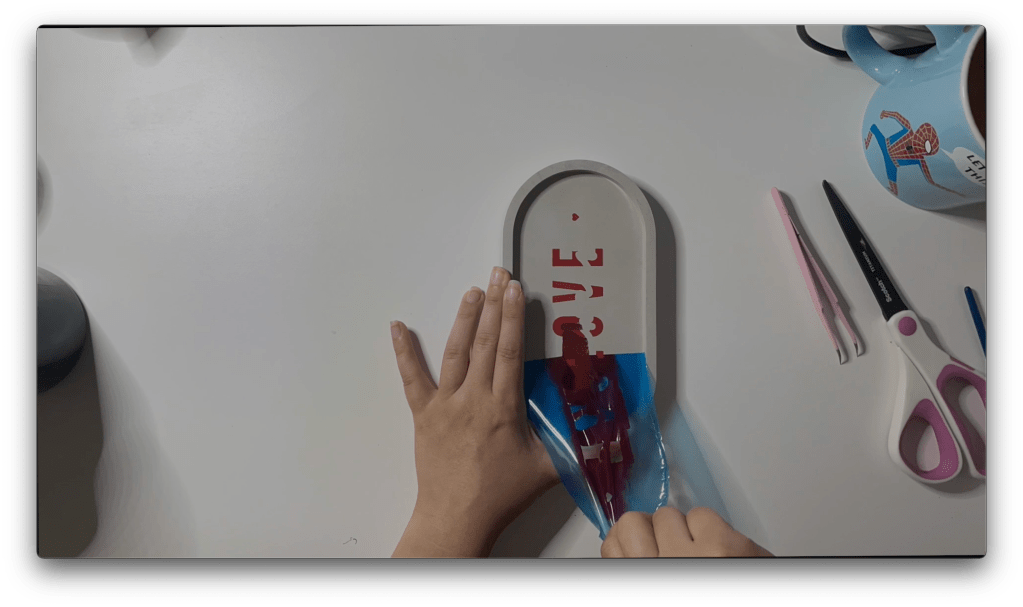
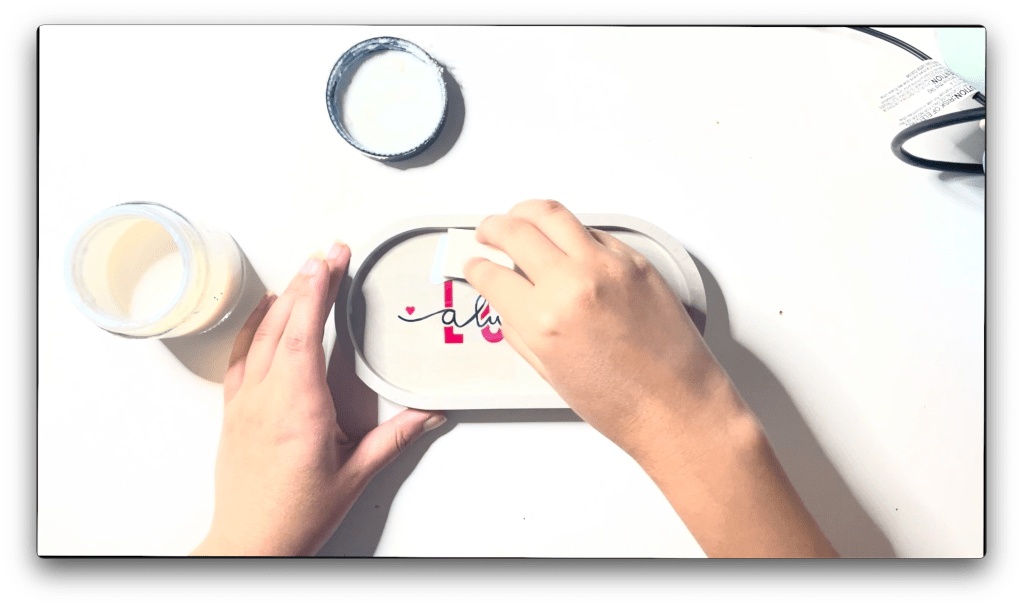
Once you have your pieces, this is the time to paint or decorate them. There are two options. The first is to paint using leather paint. I use Angelus brand which is very permanent and easy to apply. This method works great for small details, and designs where you want more depth, shading, or more freedom. It is important to paint in thin coats, allowing time to dry in between. If you paint your second coat too soon, it may lift the coat beneath and lead to a patchy appearance.
METHOD 2: HEAT TRANSFER VINYL
The other method is to use heat transfer vinyl. I love using heat transfer vinyl for more symmetrical shapes as well as colors that take multiple coats to apply.
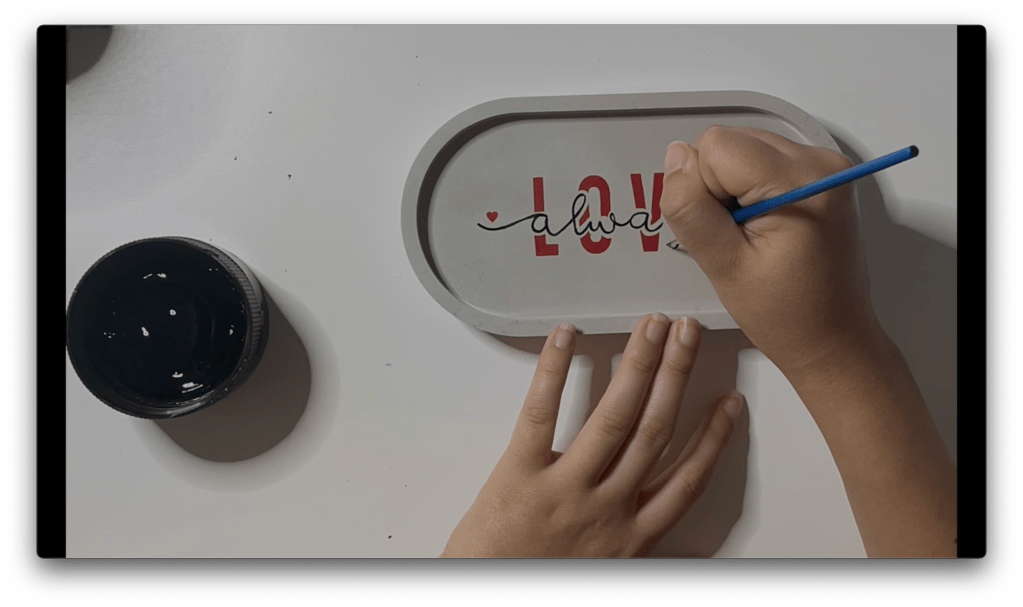
I briefly showed a total of three bows in the video. Two coco themed bows, and a sorcerer mickey bow. For sorcerer mickey, I used to use silver paint. But since the painted parts are stars and a moon, I switched to HTV for cleaner, opaque shapes. I use a cricut silver HTV, and using my mini cricut iron, with a piece of parchment paper between, press for only five seconds. With small vinyl pieces, it’s important to not heat them for too long or else the vinyl will melt and stick to the plastic rather than the material. For the coco I also used HTV, which was a bit more time consuming because the details were so small, I had to be very careful when weeding the vinyl since not all the shapes were completely cut.
GLUING THE PIECES
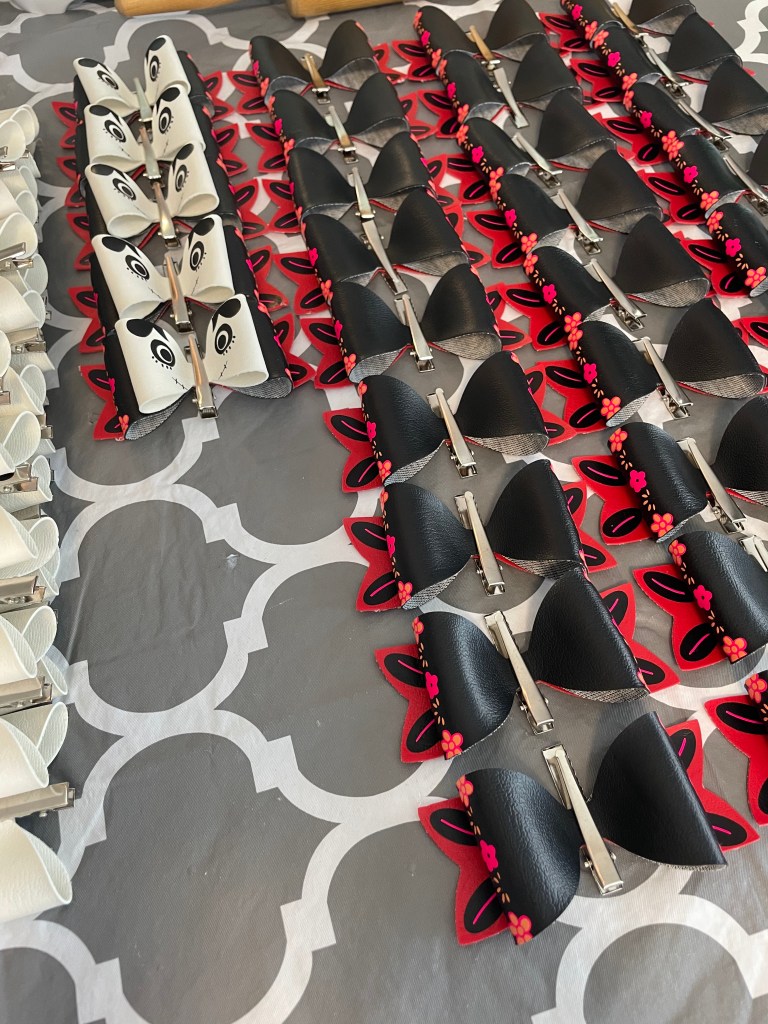
Once you have your pieces, the last step is gluing. Originally, I was using contact cement to glue the pieces, but although the glue was strong, it dried too quickly. I ended up switching to E6000 which has worked great. Apply the glue to all three points, then close the bow and use an alligator clip to keep it together until it dries. Once those pieces are dry, use the glue again to glue them together.
Finally, it’s time for the center strip. I usually can get these using the scraps from cut pieces. I cut long strips and cut them as I go. Apply the glue to the center of the bow then position the strip. Next apply glue to the end and wrap it around. Hold the bow until it’s dry, then slide the alligator clip through and push down, making sure it’s all holding together.
THE RESULT!

That’s how you make a leather bow! I sell these bows for $6 each on my Etsy. I sell the character themed ones on Stargazer Artistry, and other designs on Stargazer Lily Boutique.
If you found this tutorial helpful, please hit the like button. If you’re interested in seeing more tutorials, please subscribe. Have a craft project you’re curious about? Then comment down below and I’ll give it a shot. Thank you so much for watching.