

Hey, if you’re new to my blog, welcome. My name is Jasmin. I am a recently self-published author of a contemporary fantasy novel called “Archaic”. If you want to know more about the book, I have a video where I talk about it and the characters within it. Just click here to view the video.
When I first started planning marketing strategies, one of the things I really wanted to do was put together a PR Box for bloggers and YouTubers, because if I’m bothering them with my book, I at least want to give something in case they do decide to read it, as thanks.
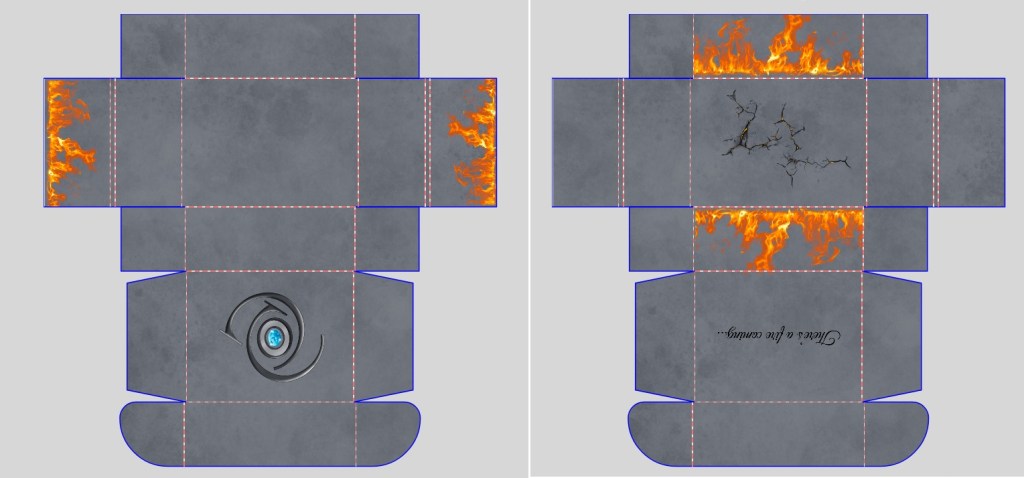
Originally, I had planned on custom ordering boxes. I had the design and the specs ready, my logo at the top, a quote on the inside, flames along the inside sides. But unfortunately, most printing places have a minimum order requirement of 500 boxes, and the ones that don’t charge much more.
I had considered getting the 500 and keeping them in a warehouse, but it just ended up being too expensive, and it’s so difficult finding bloggers with open PO Boxes that I just didn’t want to end up with a bunch of boxes I would never use.
PAINTING THE BOX
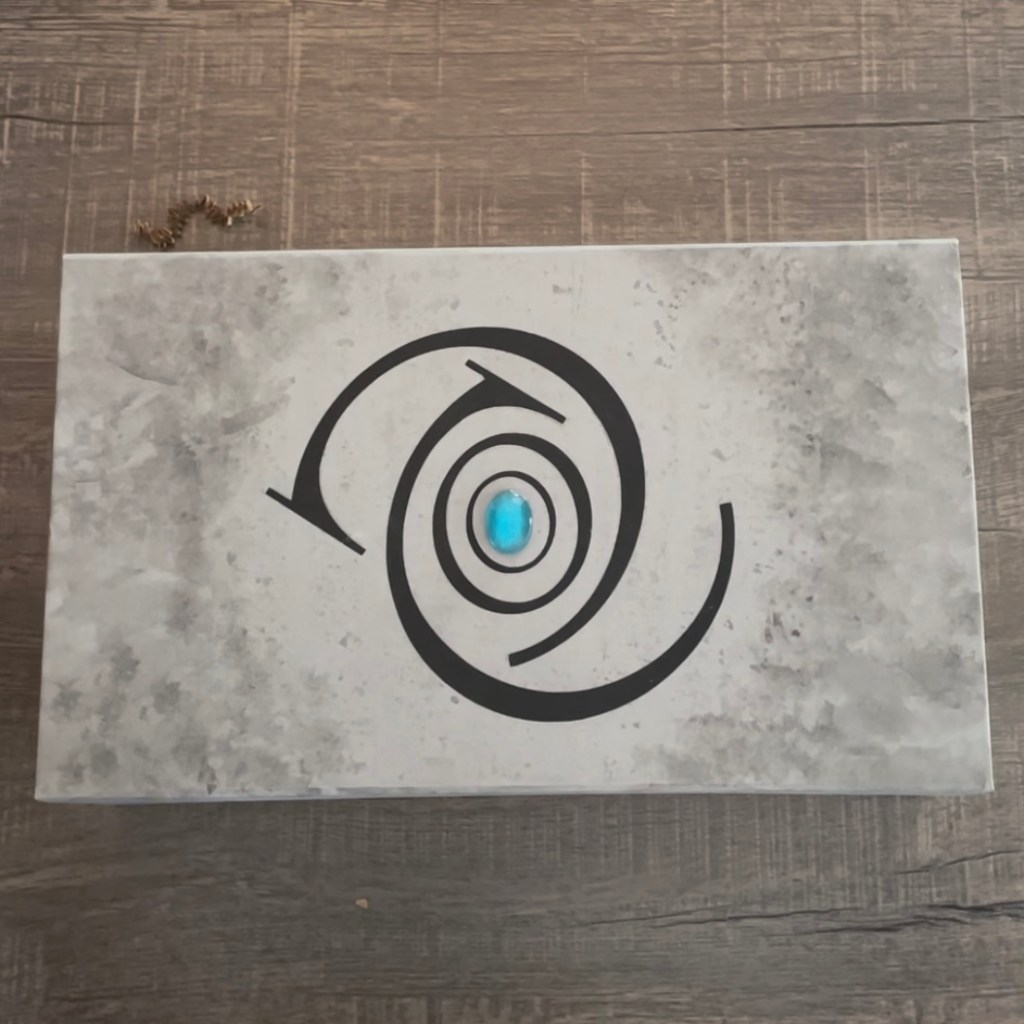
That meant looking for substitutes. That was when I remembered magnetic gift boxes. I found grey magnetic gift boxes in the perfect size and thought that maybe instead, I could paint them. The first thing I did was take my designs and cut them using my cricut, onto stencil vinyl. For the surface of the box, I wanted to have the same smoky surface as my book cover. So I took a makeup sponge and tore the edges off to get a textured edge, then dipped into grey paint and stamped it on, making sure to blend it out.
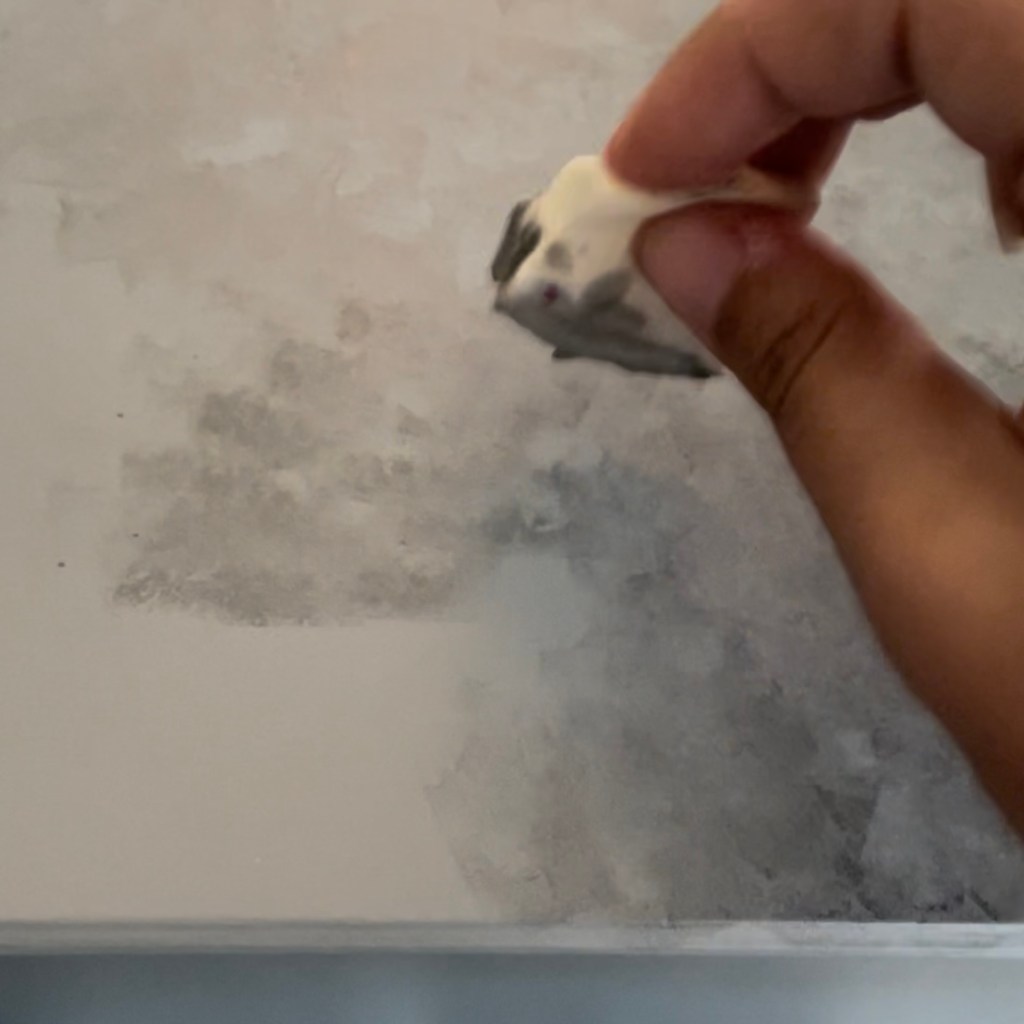
Next, I applied the stencil vinyl with my logo and stamped on black acrylic paint. That was issue number two. It turns out the surface of the box was too smooth for the paint to stick to it so the moment I peeled up the stencil, a lot of the paint peeled up with it. I knew I needed to do something to keep the paint from scratching off so easily. Once I touched up the paint that peeled, I used a matte sealer and sprayed the box outside with a total of four coats, allowing twenty minutes between each coat. That was enough to make the paint at least durable enough for handling. Next I painted the quote on the inside and did the same, spraying it four times to seal it in.

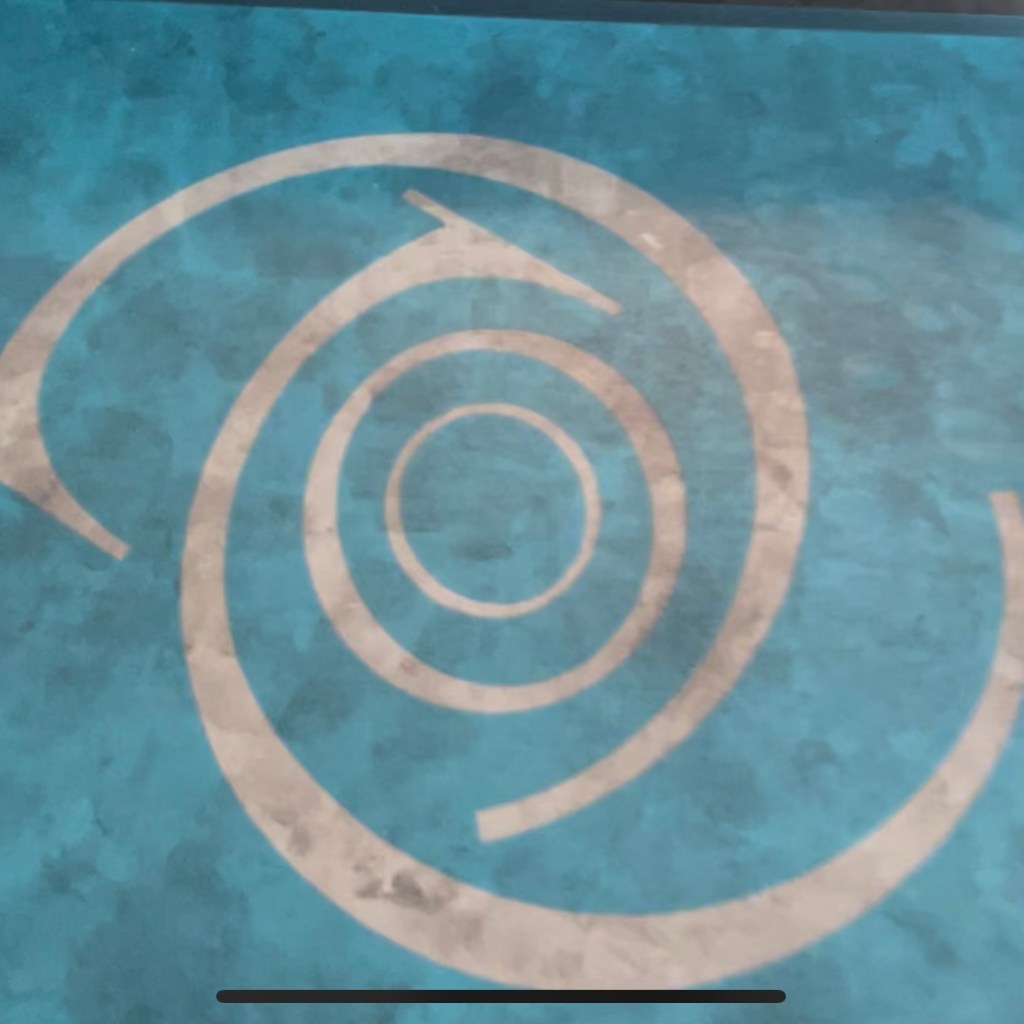
For the outside, I wanted a flat backed gem, just like the logo, but I couldn’t find one that was the right color. I bought the gem size I wanted and made a mold using mold putty, then made a resin gem. Turns out I’m bad at making a mold because my mold had a lot of bubbles on the surface. Not the resin, but the mold itself. I didn’t feel like trying again, so I painted a layer of UV resin on the gem and cured it to at least give it the shine even if it meant losing the details. Then I glued it to the box also using UV resin and the box was finished!
deciding what to put inside

ITEM 1: THE BOOK
When I was deciding what to put inside the actual box, I had a few ideas. First, of course, was the book. I decided to put the case laminate hardcover so I wouldn’t have to worry about any damage to the book.
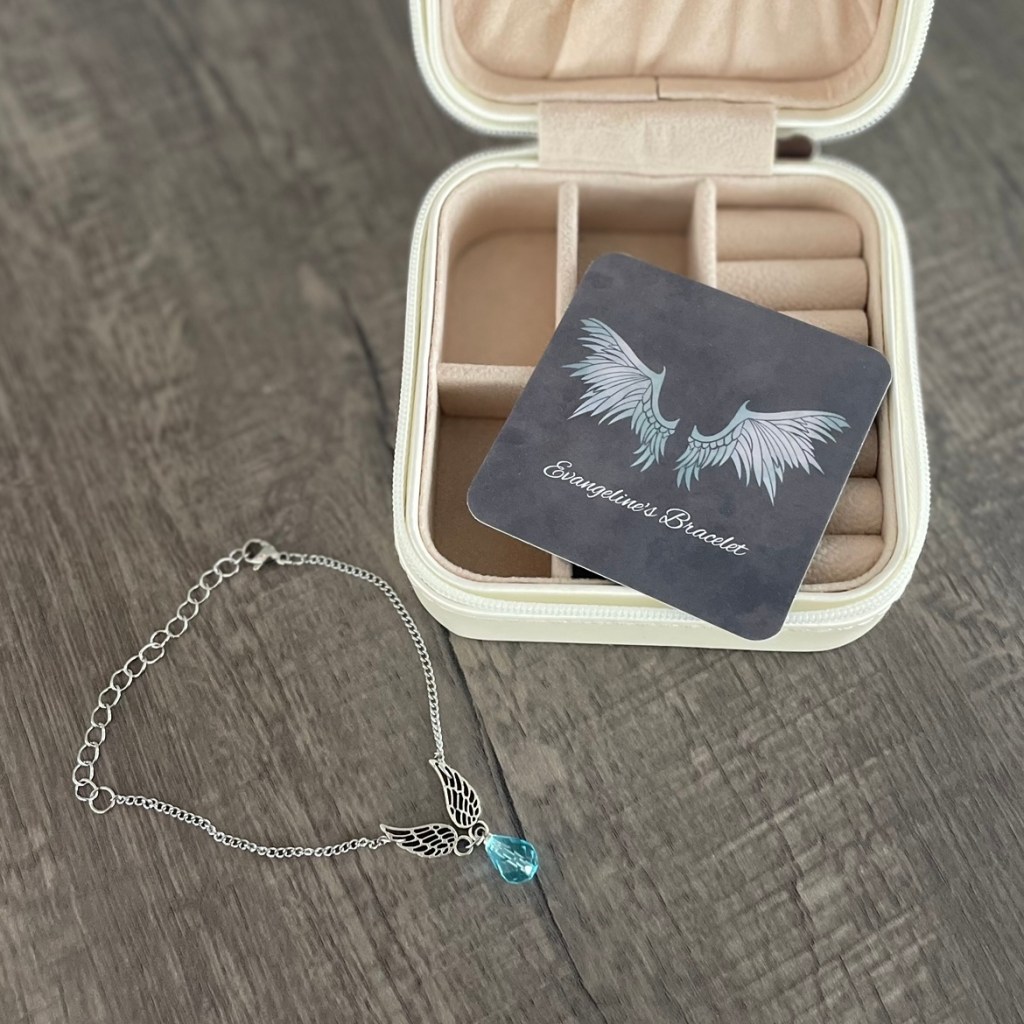
ITEM 2: EVANGELINE’S BRACELET AND A JEWELRY CASE
I wanted to make sure my items were relevant to the book of course. First I made a jewelry case and bracelet. In the book, my angel character, Evangeline, has an angel winged bracelet. I purchased all the materials I needed to make the bracelet on Amazon. This included the angel wing charms, a blue drop charm, two sizes of chains, jump rings, and the clasp. I cut the chains to the correct size, making sure it would be adjustable.
I then attached the pieces together with jump rings, and the bracelet was done. At first, I thought of just sending the bracelet alone, but I thought it would be a good idea for it to be in a jewelry case.
On my website, I sell jewelry cases, so I had a bunch of jewelry cases in my inventory. I picked the white satin like case and thought about what design I wanted on the surface. In the book, I describe the angels of having bat-like wings with translucent feathers that resemble ice crystals, blue in color. I drew out the angel wings to have that bat shape I had envisioned. Then I looked at the Siser HTV options and found this beautiful blue vinyl that was perfect for the wings. Then I ordered these cards on vistaprint. They’re square business cards. I had them printed double sided with the wings on one side, and a quote mentioning her bracelet on the other.
ITEM 3: BOOKMARKS
The second Item inside is a bookmark. My mom had bought these sublimation bookmarks and had suggested I include them in the box. I had a few thoughts on designs. First, I thought of going with a simple version of the book cover. Then I thought about quotes, and then characters. I didn’t want to use too much of my angel characters because they aren’t the focus of my book, so I thought this was the perfect chance to have my antagonist shown. My antagonist for this book is introduced in the first chapter, and it is a winged man called “Borrit”. I took a random actor headshot and photoshopped him until he was unrecognizable, and resembled my antagonist. The problem was that in my book, he has patches of scales on his skin and my first edit did not look so great. I kept showing it to my friend and because I knew she would be honest. First, she said he looked like a hot guy with eczema. Then it was a hot guy with eczema from hell. Well I told her there was no stopping him from being hot, but I could at least try to fix up the scales. I wanted to avoid cartoon dragon scales and wanted it to be more like animal scales and although the final result is not perfect, I am at least happy with it. I added shadows and flames to add to a more menacing appearance. If you’re attracted to him, well let’s face it, most movie villains have fans.
ITEM 4: A PERSONALIZED ITEM
Finally, I wanted to have one item that was more personalized to the blogger. I was making a total of three boxes to start. Unfortunately, only one made it to the intended blogger, or at least I hope since it was the only one not returned to me. For her, I saw she had put a video of her favorite things which included a specific journal brand. I used heat transfer vinyl to add my logo to it.
The second one I sent was to Corinne Leigh of Threadbanger. She’s not a book blogger of course, but she’s a book lover and I loved watching her videos. That return to sender notice definitely stung. I had hoped their PO Box was miraculously open since Rob is back to uploading videos, but I was sadly disappointed. For hers I had designed a witchy moon cover and stamped it onto a black journal with red pearlescent paint. But the journal didn’t go to waste because I found a blogger through threads who was interested in promoting new authors and I sent it to her. Her page is all dark romance books, I’ll link her instagram below. Obviously that is not witchy, but I thought maybe at least the colors would possibly appeal to her.
The third box which was also returned, I couldn’t find information on her likes so I just fixed up a book bag.
packing everything up
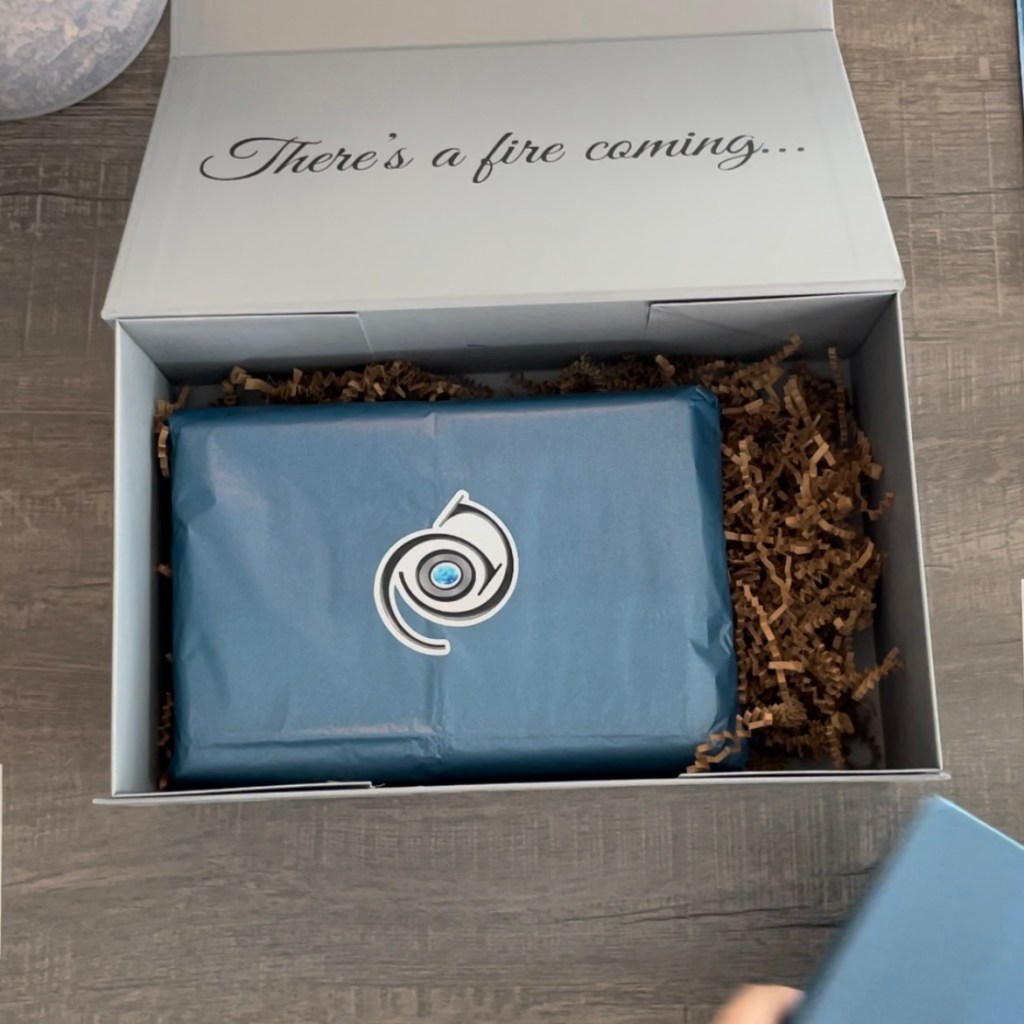
I wanted everything to look nice, so I bought a blue metallic tissue to wrap everything in, threw down some shredded paper for protection, and my logo sticker and closed it up. For shipping, I wrapped the box in craft paper and shipped them out!
And that is how I put together my first PR Boxes. I still have two Boxes, so if you’re a blogger interested in one, send me an email or message me on my instagram. Just please include information on your blog.
If you’re interested in seeing more videos, please subscribe to my channel. Thank you so much for watching!
