Painting Animated Characters

I used to paint canvases all the time, I hadn’t in a few years. Since my painting skills have improved over the years, I decided it was time to get back to it.

Where do I get my canvases?

Michaels is a great source for good canvases, at least for someone who doesn’t paint exclusively for their career. They often have wonderful bulk discounts, and the canvases come primed, the corners are smooth, and the base is stretched tightly. Earlier last year, I purchased a 12-pack of 10″x10″ level 3 canvases for a great price, but they had been in their storage container for far too long.

Deciding what to paint

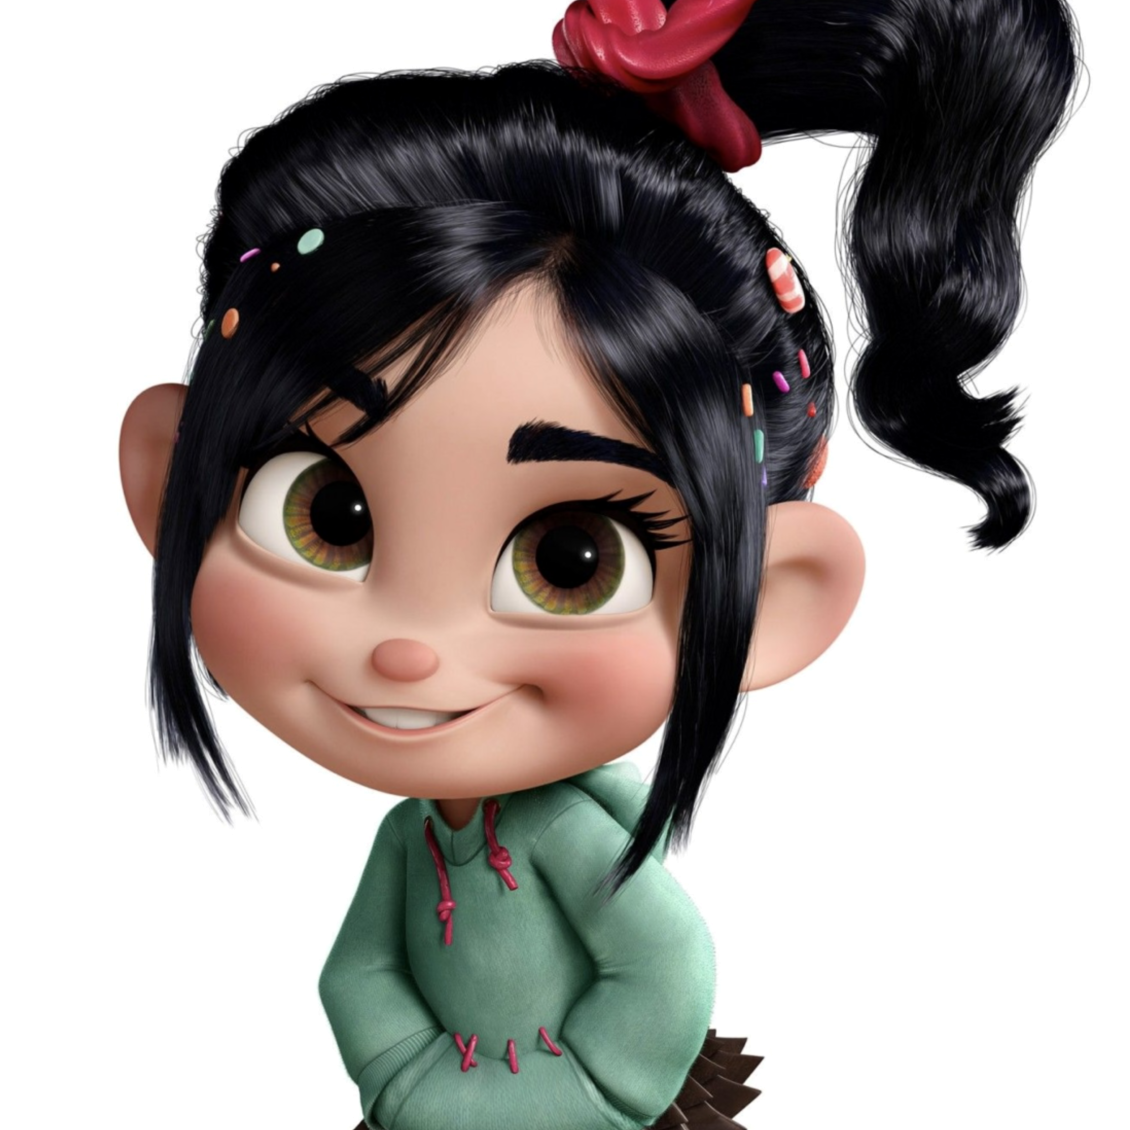
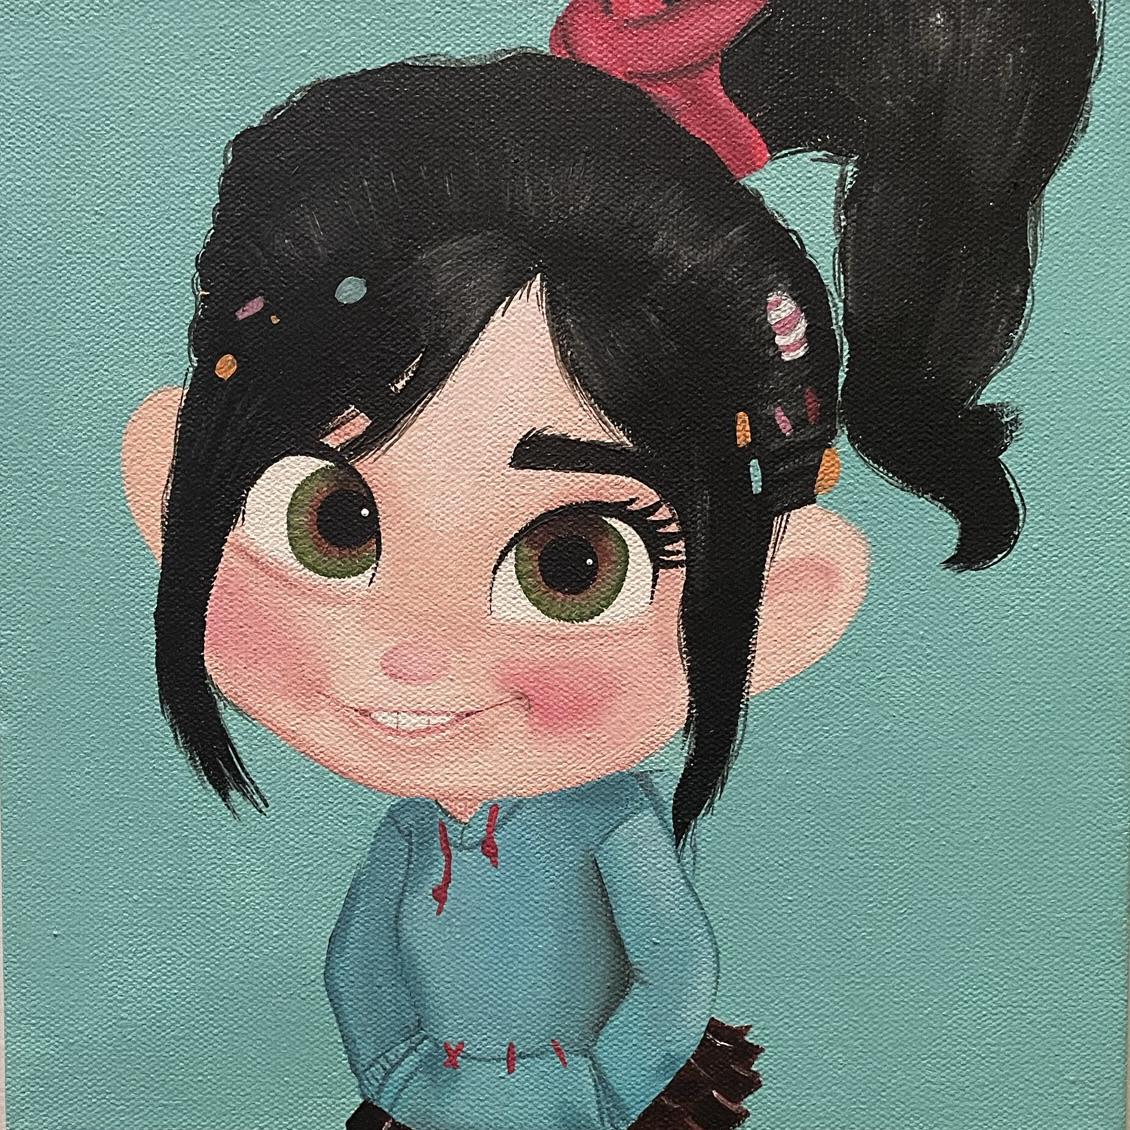
VANELLOPE (WRECK IT RALPH)

I knew I wanted to stick to animated characters, but I didn’t want to limit myself to a particular style. When I decided I was going to paint fictional characters, I asked my mom if she had a preference. She selected Vanellope von Schweetz as my first subject. For those of you who don’t know who that is, Vanellope is a quirky and energetic character from the Disney animated movie, Wreck it Ralph. She is an outcast racer in a racing arcade game with a candyland style. Since she is a 3-D animated character, I at first worried I would be unable to capture her energy and adorable appearance.

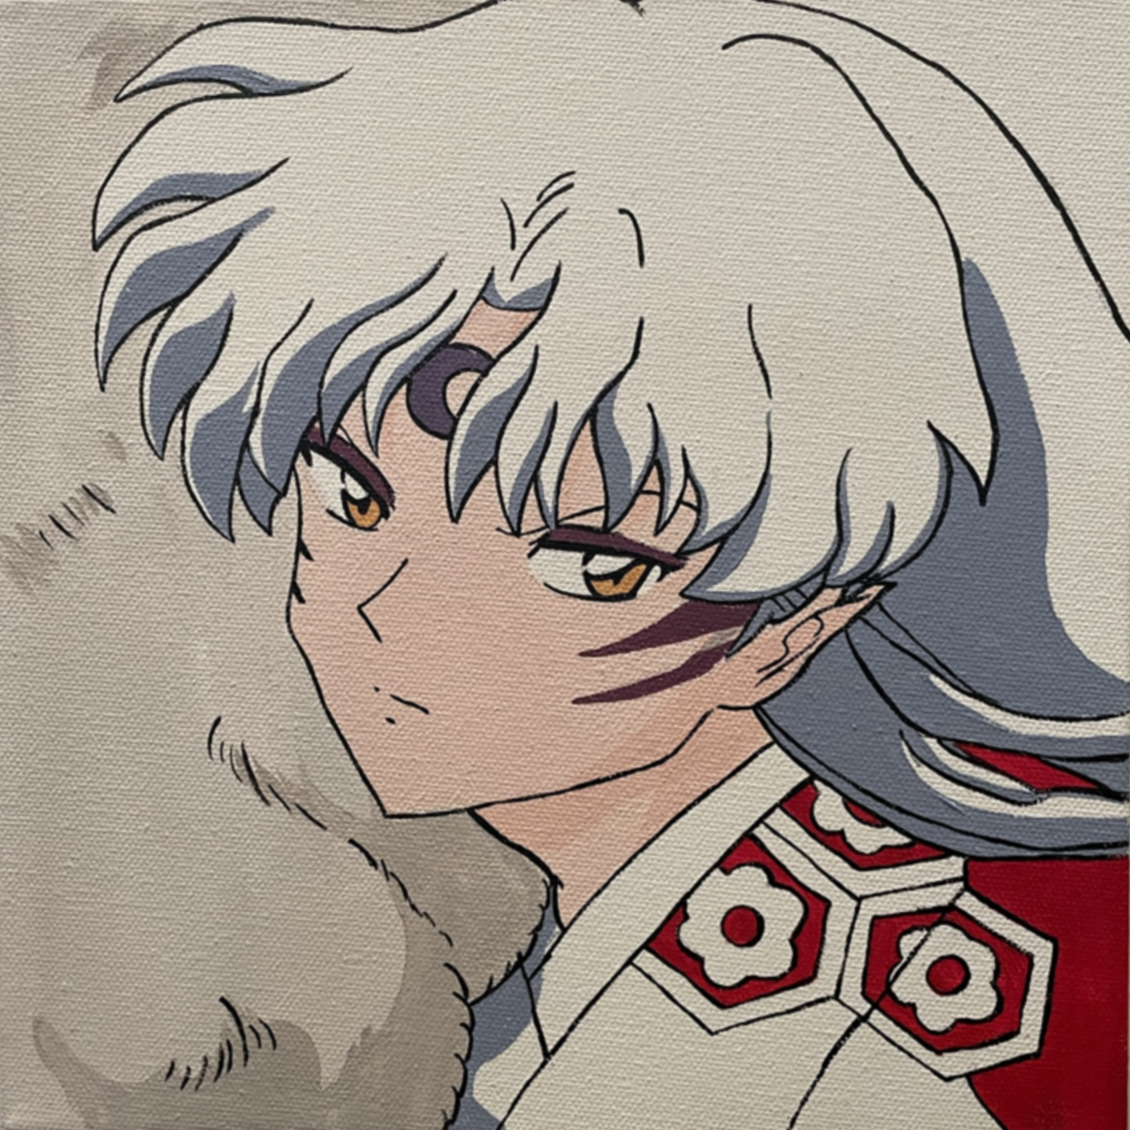
SESSHOMARU (INUYASHA)

Next I asked some friends to tell me who some of their favorite animated characters were. One of the girls recommended a few anime characters who were familiar to me. As soon as she gave me her list, I just had to paint Sesshomaru. Sesshomaru is a character from the Japanese anime, “Inuyasha”. He is the demon half-brother of the titular character. He is an antagonist at the start, but eventually became a common fan favorite due to a subtle shift in his nature. He was actually a little more difficult to paint because of the many line details, but I was happy with the result.
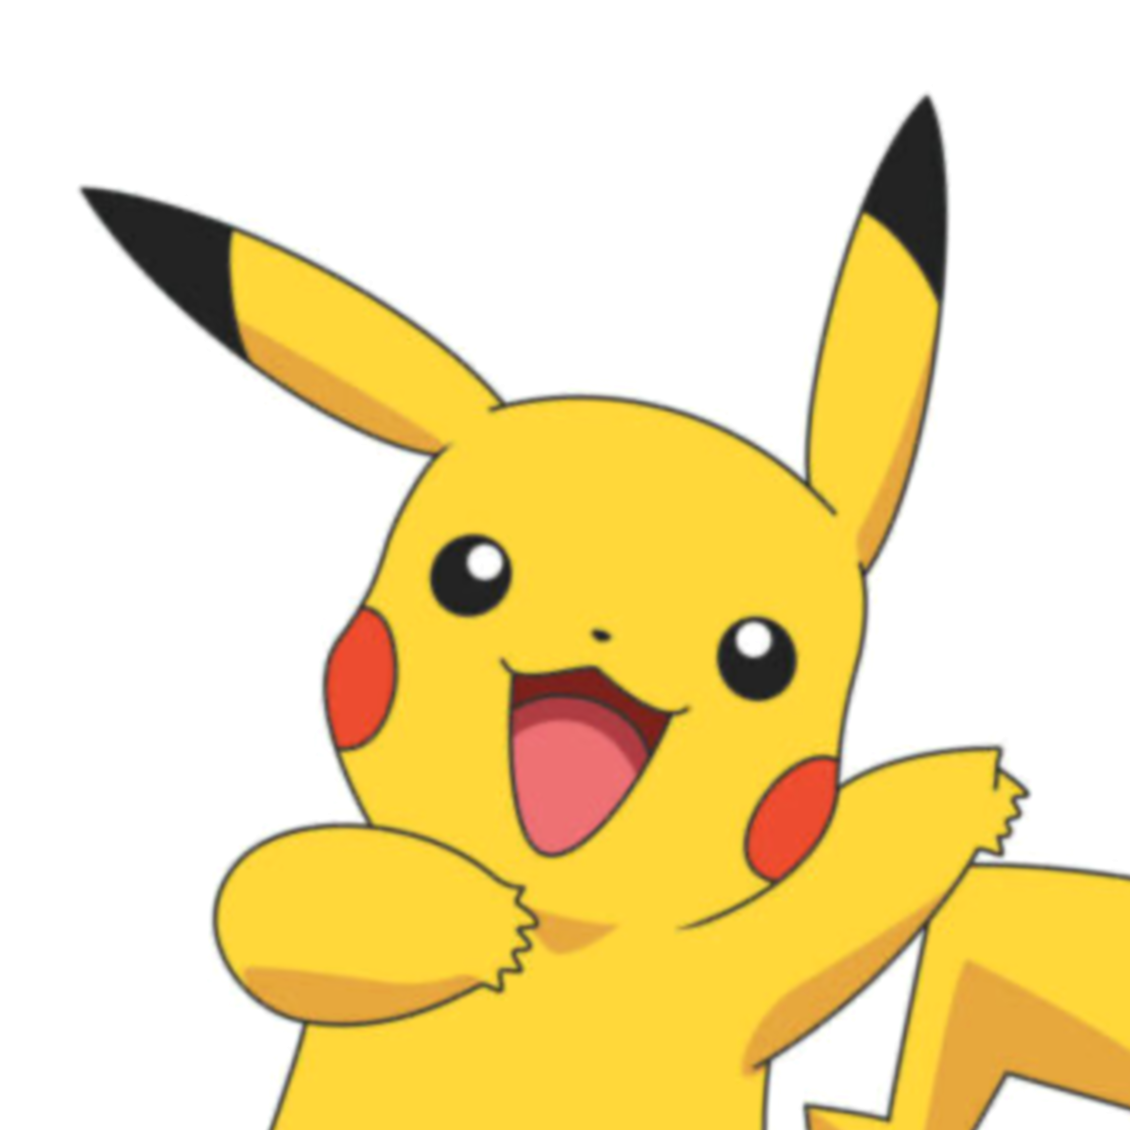
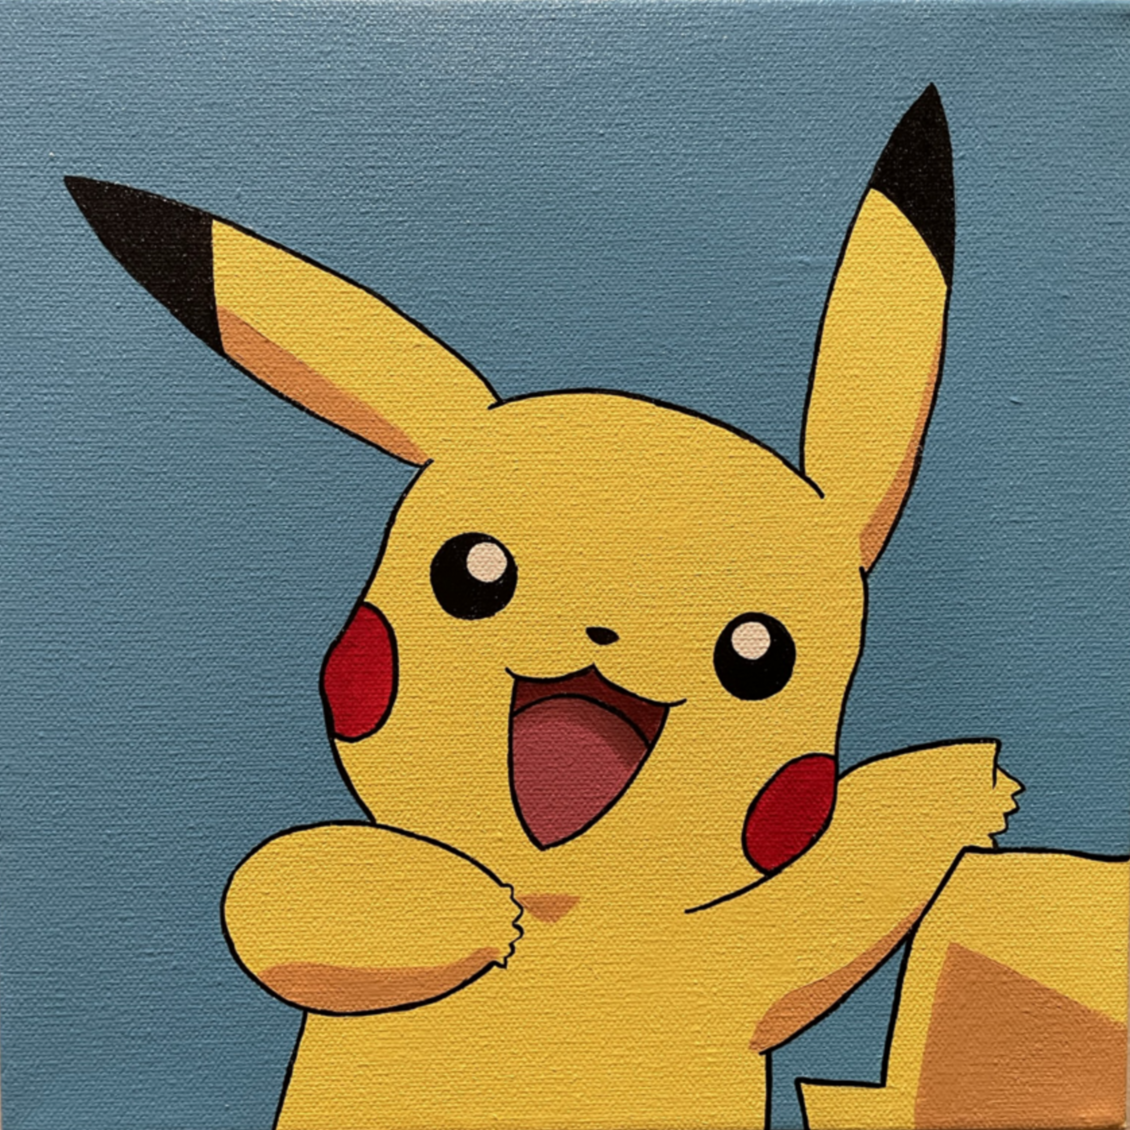
PIKACHU (POKEMON)

Another recommendation from a friend was to paint Pokemon characters. As someone who only watched the first two movies and played one of the nintendo ds games, but never watched the show very much, I am not familiar with many of the Pokemon. But it’s impossible not to know who Pikachu is, so I decided he would be the first to paint. Pikachi was definitely the easiest of these three characters to paint due to the simple 2-D animated style.

Capturing the process

Painting reels are everywhere, so I of course had to record my own. I’m still working on ways to improve how I record the process, but for now I was able to get some of Vanellope and Pikachu.

Where to find future Paintings

Of course I am planning on continuing to paint characters in the future, and hopefully improve the recording process. If you’re interested in seeing these youtube shorts in the future, you can find the link to my youtube channel on the homepage, or click here to find it.

If you aren’t interested in watching the videos, but do want to buy one of these paintings, you can find them on my other Etsy, Stargazer Artistry. The painting prices vary based on how much time was spent on them. Have a character you want to see painted? Comment below or on any of the youtube shorts. Want to order a custom character painting? Email me at stargazerartistryus@gmail.com or message my on the Stargazer Artistry Etsy.

“Be your own rainbow” painted faux leather purse tutorial

Today I’m going to show you how I turned this cute faux leather purse into this adorable rainbow purse!

Step 1: Sketch the outline

Using a pencil and ruler, measure the width of the purse base and separate it into six lines. Sketch the cloud shape and connect the lines to the cloud. Don’t worry about the pencil marks, the paint will cover them up later.

Step 2: Paint your bag

Using an angled paint brush, paint your stripes in rainbow order, one thin layer at a time, allowing each coat to thoroughly dry. This will ensure even coverage.

Using a fine point paint brush, outline the cloud with the “pewter” metallic gray paint for a more defined shape.

Step 3: Prepare your text file

Upload a picture of the bag onto procreate. Add your text and select the font you would like. Line the text the way you would like. Save the text only as a PNG file and convert it to an SVG using the convertio website. Want the SVG file shown on the video? Buy it here for $1

Step 4: Cut the text on a cricut machine

Upload the SVG file. Using the photo reference, estimate how large your file should be. Cut your glitter HTV to the correct size and place it on your cricut mat.

Remember to set the design to mirror. On the custom setting on the cricut dial, set the material to “Glitter HTV” then set the pressure to “MORE”. This will ensure the material cuts through.

Step 5: Prepare and apply the HTV

Using a pair of pointed tweezers, weed out the design.

Preheat your iron to the lowest setting. Since the quote is on the pouch portion of the purse, I placed my hardcase wallet inside in order to give me a hard surface.

Line up the design, then place a piece of parchment paper above the design for extra protection.

Working in ten second intervals, iron on the HTV onto the purse until the plastic easily lifts.

Results: One Adorable Rainbow Purse!!

And our project is complete! One adorable bright rainbow purse with shimmering vinyl.

If you don’t have the equipment or supplies to complete this project, this bag is available on our store stargazerlilyboutique.com. However, there is only one available, so get it before it’s gone!

SUBSCRIBE FOR UPDATES

Half Sick of Shadows, Laura Sebastian

A mesmerizing retelling of Arthurian legend’s minor character…

Half Sick of Shadows is a romantic retelling and expansion of a character known only from her tragic poem.

SYNOPSIS

Everyone knows the legend. Of Arthur, destined to be a king. Of the beautiful Guinevere, who will betray him with his most loyal knight, Lancelot. Of the bitter sorceress, Morgana, who will turn against them all. But Elaine alone carries the burden of knowing what is to come–for Elaine of Shalott is cursed to see the future.

On the mystical isle of Avalon, Elaine runs free and learns of the ancient prophecies surrounding her and her friends–countless possibilities, almost all of them tragic.

When their future comes to claim them, Elaine, Guinevere, Lancelot, and Morgana accompany Arthur to take his throne in stifling Camelot, where magic is outlawed, the rules of society chain them, and enemies are everywhere. Yet the most dangerous threats may come from within their own circle.

As visions are fulfilled and an inevitable fate closes in, Elaine must decide how far she will go to change destiny–and what she is willing to sacrifice along the way.

A story never told…

The story as advertised is an Arthurian legend, but not the way you might remember them. Something I have always loved about Arthurian legend is that no story is completely the same. Most of the details always remain the same. Arthur pulls excalibur and claims his throne. Lancelot, Guinevere, and Morgana all betray him, and eventually Arthur meets his demise. A tragic story indeed, but this isn’t just about them. This is the untold story of Elaine of Shalott.

Meet the woman cursed with the future…

Elaine was a character I had never heard the name of, but when I saw she was the main character, I was surprised by how little information I found about her. In the more known poem, Elaine is a woman suffering from an unrequited love. Enamored with Lancelot, when her feelings are not returned, she dies and her body drifts down the river. But the author of this story felt she deserved better. In this story, Elaine is now only the main character, but a woman who has seen every tragedy that is to come to Arthur and their friends. Sebastian does an incredible job of creating a character who can see the future without removing the things I loves about Arthur’s story.

A story more about heart than adventure…

Characters are always my favorite part of a story. I was pleasantly surprised at how much the story focused on the characters and their relationship. I am by no means an expert on Arthurian legends, and am only familiar with the major details of the stories. However, I felt that the characters were much more fleshed out in this story. Guinevere for example, I only knew for her doomed romance with Lancelot, but in this story she is much more than Arthur’s eventual wife and traitor. In this story she is still kind but she is also fearless. She is a force not to be reckoned with who even Lancelot knows to fear. It was a pleasure getting to know these characters.

MORE DETAILS

Word Count (rounded)~ 133, 952

Page Count: 432

Genres: Arthurian Romance, Fantasy, Fairy Tale

A story for the romantics, not the historians…

When I began this story, I fell in love with Elaine and her narrative. I enjoyed getting to know the character’s through her eyes. But I was surprised when I noticed bad reviews, until I realized they were written by readers frustrated with the historical inaccuracies. If you are a fan of Historical fiction, this is not the story for you. You may be put off by the constant mention of corsets and drinking tea. However, if you are like me and are unbothered by such inaccuracies, then you will have no issues with this story.

What drew me in was the love between these characters. When I speak of love, I do not just mean romantic love, but familial love. Every chapter reminded me of how close these characters were in a way that had me dreading the tragedies that could someday happen just as Elaine does in this story.

A story that left me wanting more…

All good stories come to an eventual end, and this one was no exception. It is difficult to discuss what I loved about this story without spoiling anything, but I grew so attached to the characters that when I realized the story was almost over, I felt disappointed. Not only because I wanted to spend more time with them, but for reasons I can’t say without spoiling it for excited readers. I truly hope that the versions of these characters I fell in love with will someday make it to the big screen.

SUBSCRIBE FOR UPDATES

“Bee wild & free” Sublimation Tote Bag Tutorial

Today I’m going to show you how I designed and made this sunflower design on the procreate app, then made a sublimated bag.

FOR THE DESIGN

Procreate app on ipad

Honeybee Spring Procreate Stamp Pack

0r/ Completed “Bee wild & free design”

“Lovely Home” Font

“Marchila” Font

EQUIPMENT

Sublimation Printer

Heat Press

MATERIALS USED FOR BAG

sublimation canvas tote bag

parchment paper

sublimation print of design (don’t have a sublimation printer? Many etsy sellers sell custom sublimation prints)

Step 1: Download the Stamp Pack

The honeybee spring procreate stamp pack in the video is available to purchase here for just $3. Want the completed design file? Get it here and skip to step 3.

Step 2: Create your design on procreate

For my design, I knew I wanted a sunflower to be part of the picture so I started by stamping the petals then the center I preferred. I then arranged some of the different honeycomb shapes as well as the honeybees. 

After looking on the internet for different bee pun quotes, I chose my favorite “Bee wild and free” and typed it out. The font I am using in this image is the “Lovely Home” font which I downloaded online. However, the font did not have an and symbol, so I used the “Marchila” font for that instead. The links for both these fonts are in the materials list.

When I placed the font on top of the image, I felt the lettering did not stand out as much as I wanted it to. I fixed this problem by using my eraser to clear a border around the lettering over the sunflower.

Step 3: Print and prep Sublimated Design

I printed the design using my sublimation printer and purchased a 10 pack of sublimation bags on Amazon. Sublimation items are made of polyester or have a special polyester coating which allows the ink to fuse into the fibers. Sublimation will not work on any material not containing polyester. If you do not have access to a sublimation printer, there are Etsy sellers who sell sublimation transfers.

To apply your sublimation transfer, preheat your heat press to 365 degrees. Lay out your bag and heat it for about ten seconds to prep the surface. This will remove any wrinkles or fold lines from the surface.

Next, line up the design on the bag and use heat resistant tape to hold the design in place. Place a sheet of parchment paper above the design for extra protection. The amount of time needed will vary depending on your heat press. For my heat press, pressing the design for 80 seconds gave me the best results. Remove the papers to reveal the completed bag!

Results: One Cute Book Bag!!

And our project is complete! One adorable spring themed canvas bag.

If you don’t have the equipment or supplies to complete this project, we are selling these bags on our store stargazerlilyboutique.com. However, there are only ten available, so get them while you can!

SUBSCRIBE FOR UPDATES

Shadow and Bone, Leigh Bardugo

An intriguing enough world…

Shadow in Bone is a simple story that was saved by its unique fantasy world, but the characters and story itself felt a little lacking for my tastes.

SYNOPSIS

Soldier. Summoner. Saint. Orphaned and expendable, Alina Starkov is a soldier who knows she may not survive her first trek across the Shadow Fold―a swath of unnatural darkness crawling with monsters. But when her regiment is attacked, Alina unleashes dormant magic not even she knew she possessed.

Now Alina will enter a lavish world of royalty and intrigue as she trains with the Grisha, her country’s magical military elite―and falls under the spell of their notorious leader, the Darkling. He believes Alina can summon a force capable of destroying the Shadow Fold and reuniting their war-ravaged country, but only if she can master her untamed gift.

As the threat to the kingdom mounts and Alina unlocks the secrets of her past, she will make a dangerous discovery that could threaten all she loves and the very future of a nation.

Welcome to Ravka . . . a world of science and superstition where nothing is what it seems.

Meet Alina Starkov…

The story begins with Alina Starkov, a mapmaker whose unit has been chosen to cross the Shadow Fold, a mysterious area of darkness filled with monsters that separates the nation in half. Alina is introduced as an orphan who has always felt out of place due to her insecurities about her appearance. Her only friend is Mal, her childhood friend.

As someone who watched the first season on Netflix first, I was surprised to learn that Alina was not half Shu as she was on the live action adaptation, and it was a detail that was truly missed. While she does often mention her own insecurities, I never got the sense that she was as much as an outcast as I did from watching the show.

Something Missing…

If someone were to ask me what I enjoyed about the book, I’m afraid I would not have much to say. While I do not have anything particularly negative to say about this book, I unfortunately cannot describe anything as truly exciting. In this story there is one main character as well as what I what I would categorize as three supporting characters. At the start of her story when she is introduced, her childhood friend Mal is introduced as well. Later we are introduced to the Darkling as well as Genya. Yet despite the small ensemble of characters, there was not much described of any of them.

As someone whose favorite part of any story is its characters, I was disappointed to learn so little about them. Although their actions are described, there was not much said about their personalities, interest, flaws, or anything. In fact, when these characters began to form their relationships, I felt that none of the relationships felt deserved and that the characters were simply being pushed together like dolls.

MORE DETAILS

Word Count (rounded)~ 81,000

Page Count: 358

Genres: Young adult fiction, fantasy, adventure

I found things especially lacking with the romance in the story. It’s rare to pick up a YA novel and not be introduced to a romantic plot line, and although there is romance in this story, I could only describe it as “blink and you’ll miss it”. The romantic tension between the characters was nonexistent.

The World Introduced…

Trying to come up with the words to describe how I felt about this story has been a struggle, however what I can discuss is the world itself.

This fantasy world introduced by Bardugo is what I felt has potential. The system is well described and whatever information about this world’s conflicts were easy to understand throughout the story. In fact, it left me desiring a story focused on one of the Grisha’s instead. What was it like when their power was discovered? Were they torn from their families? What were their responsibilities beyond training and performing for the wealthy?

Hopes for the Sequel…

Although I wasn’t very satisfied by the story, I am hoping that now that the world has been established that the characters will be more fleshed out in the sequel. Thanks to the Netflix series, I was able to read this story with a clear picture of the characters in my head. My primary hope is that the sequel will prevent me from having to rely on the Netflix series and have me fully immersed in what is on the page. Perhaps my opinion would have been different if I had read the series as a child, but I truly hope book 2 will surprise me.

SUBSCRIBE FOR UPDATES

“LOVE always” Concrete Tray Tutorial

Today I’m going to show you how to paint a concrete tray using images from the cricut design space! Check out our youtube for more video tutorials in the future.

MATERIALS USED

cricut machine

Concrete Tray

Stencil Vinyl

Masking Tape

Pointed Tweezers

Acrylic Paint

-permanent red

-permanent black

Makeup Sponges

Fine Point Paint Brushes

Concrete Sealer (coming soon)

Step 1: Pick out a concrete item if you haven’t already

The concrete tray in the video is available to purchase here for just $15.

Step 2: Create your stencil on the cricut design space

Our first step is to create a shape for our stencil. Open a new project, and add a square to the design space. Unlock the shape and set it to the size needed. Since I am using our concrete tray, I measured the inside. To match the measurements, I will need to set the shape to 4″x3.25″.

Add a circle and set it to the same height as the rectangle. Line up the circles to both sides and weld the entire shape together. Then adjust to the correct length. I had to adjust the overall shape to 6.5″

Next, upload the files you will be using. Cricut has a variety of images available on their design space. Some free, and some available for a one time purchase. I will be using this “love always” image.

Weld the image pieces together by color. Place the image over the stencil shape and slice to create the stencil.

Step 3: Cut and prep your stencil

Cut your stencil vinyl to the needed size and place it on your cricut mat. Set the dial to custom and select the stencil vinyl setting. Weed out the design using a pair of pointed tweezers or a weeding tool.

When transferring your stencil to the journal surface, DO NOT use transfer vinyl. I’ve learned that Transfer vinyl is often too sticky and can lead to the stencil vinyl tearing. Instead, using masking tape, laying it on the stencil then removing the backing. Since my stencil is all one piece, I was able to line up the stencil without using masking tape.

Step 4: Paint your concrete item

Using a makeup sponge, pick up some of your paint and paint the tray with a stamping motion. It is best to work in thin layers, allowing it to dry in between layers. You can use the same sponge for multiple colors by cutting off the edge. 

Once the image is completely painted, remove your stencil.

Part of the way through the painting process, I realized I could not use the cursive lettering stencil for two reasons. One was that I was unable to layer the two due to lack of visibility. The other was the acrylic paint was too delicate and peeled off when layering stencils. Instead, I used a fine point paintbrush to carefully paint on the cursive writing.

Step 5: Seal the tray

Set the tray aside allowing the paint to dry for at least 24 hours. Using a damp makeup sponge, seal the concrete tray using a concrete sealer, applying a thin layer. Set aside the tray to dry another 24 hours then add another thin layer of sealer.

Results: One Beautiful Concrete Tray!!

And our project is complete! One beautiful concrete tray with your own personal touch.

If you don’t have a cutting machine to complete this project, we are selling this tray on our store stargazerlilyboutique.com. However, there is only one available!

SUBSCRIBE FOR UPDATES

Sword of Destiny, Andrzej Sapkowski

A disappointing follow up to an amazing first book…

Sword of Destiny was an aggravating read and the first book I have ever quit. The second book in The Witcher series will make you question if the characters are truly the same ones.

SYNOPSIS

Geralt the Witcher battles monsters, demons and prejudices alike in Sword of Destiny, the second collection of adventures in Andrzej Sapkowski’s groundbreaking epic fantasy series that inspired the Netflix show and the hit video games.

Geralt is a Witcher, a man whose magic powers, enhanced by long training and a mysterious elixir, have made him a brilliant fighter and a merciless hunter. Yet he is no ordinary killer: his targets are the multifarious monsters and vile fiends that ravage the land and attack the innocent.

Sword of Destiny is the follow up to The Last Wish, and together they are the perfect introduction to a one of a kind fantasy world.

A surprisingly controversial read…

When I finished the The Last Wish, I could not wait to get my hands on the second book so I could continue following Geralt’s journey and learn more about Yennefer. Yet within the follow up’s first chapter, I found myself struggling not to skim through the pages. The more I read, the worse the writing directed at the women became.

For those familiar with the Netflix show, the first chapter begins with the quest for the dragon, but things are different than the Netflix episode. Yennefer, angry with Geralt for his wish and desperate to reverse her infertility betrays Geralt by using paralysis magic on him, but is then attacked by the band of dwarves. This was when the first shock came when the band of dwarves ties Yennefer up and tear her shirt open to expose her, threatening her with rape. The scene is followed by Dandelion described to stare at her bare chest. When Yennefer tells him to stop, the line is what follows:

“Not on your life,’ Dandelion said, without taking his eyes off the bedraggled sorceress. ‘I’m here because of her. They may slit our throats, but at least I’ll die happy.”

-Excerpt From: Andrzej Sapkowski. “Sword of Destiny (The Witcher).” Apple Books.

MORE DETAILS

Word Count (estimated)~ 104,000

Page Count: 416

Genres: Fantasy

Although I managed to read the dragon quest story, it was the next chapter that truly irked me. Geralt and Yennefer in the next story are living together, but not happily as he seems to be annoyed with Yennefer in every page and Yennefer’s only role seems to be dressing herself with makeup and fragrances. But it was Geralt’s time at the inn which destroyed my will to finish the story; specifically this paragraph:

“He was annoyed by the cold, congealed scrambled egg he was served for breakfast by the innkeeper, who tore himself away for a moment from groping a girl in the kitchen. He was annoyed that the girl was no more than twelve years old. And had tears in her eyes.”

Excerpt From: Andrzej Sapkowski. “Sword of Destiny (The Witcher).” Apple Books.

The line itself felt unescessary and the content was appalling, but what truly bothered me was Geralt’s simple annoyance and lack of interference. Although the witcher claims to never interfere, the first book seemed to prove he did nothing but interfere. Yet the author felt it necessary to write this moment where Geralt witnesses a 12-year-old girl being groped and does nothing.

The First Story I’ve Ever Quit…

Perhaps there is a chance the story drastically improved in the remaining 75% of the book, but I could not get myself to pick up the book again after that and eventually gave up on trying. The magic which intrigued me in that first book seemed to be lacking and Yennefer who was a mystery for most of the first book felt vain and one-dimensional. I felt if I had finished the book only to be disappointed, it would taint my love for the first book and possible the remaining of the series.

Improvements Ahead…

When I first picked up The Witcher series, I began reading book three before realizing there were two written before. I read 20% of the story before realizing my mistake and beginning book one instead, and what I had read of book three, I deeply enjoyed. Although I hope to never feel this way about his remaining books, I am at least taking comfort knowing book three will restore the magic of the first book.

SUBSCRIBE FOR UPDATES

Autumn Leaf Journal Tutorial

Today I’m going to show you how to make this cute autumn journal using our autumn leaf SVG files! Check out our youtube for more video tutorials in the future.

Step 1: Purchase the Autumn Leaf Files if you haven’t already

These autumn leaf filese are available to purchase here for just $4.

Step 2: Create your stencil on the cricut design space

Our first step is to create a shape for our stencil. Open a new project, and add a square to the design space. Unlock the shape and set it to the size needed. Since I am using an A5 journal, I will need to set the shape to five and a half inches by eight and a half inches.

Next, upload the files you will be using. For this project, I am only uploading the leaf silhouette SVG files. I knew I wanted a quote at the center, so I put together this using procreate. You find the download on the materials list, or use one of the various designs available on Etsy.

Arrange the files onto the rectangle, resizing the pieces and arranging them until you have a design you like. I am changing the color of the leaves to give myself a better idea of how I want the final product to look.

Once your design is complete, select everything except the original rectangle and group them together. Since I would like to keep this as a reference, I am making a copy of this group and turning off the visibility while I continue to work. Weld the files together. Then select them along with the rectangle and slice the image. Delete the excess parts so you are left with a single stencil of the design. Now it’s time to cut!

Step 3: Cut and prep your stencil

Cut your stencil vinyl to the needed size and place it on your cricut mat. Set the dial to custom and select the stencil vinyl setting. Weed out the design using a pair of pointed tweezers or a weeding tool.

When transferring your stencil to the journal surface, DO NOT use transfer vinyl. I’ve learned that Transfer vinyl is often too sticky and can lead to the stencil vinyl tearing. Instead, using masking tape, laying it on the stencil then removing the backing. Line the journal up to the stencil and press it flat. Then remove the masking tape, one strip at a time, pushing down any smaller details that may lifting with the tape.

Step 4: Paint your journal

Using a makeup sponge, pick up some of your paint and paint the journal with a stamping motion. With leather paint, it is best to work in thin layers, allowing it to dry in between layers. I started with white followed by pale yellow, then rose gold, then finally fire red. You can use the same sponge for multiple colors by cutting off the edge. 

Once each shape is completely painted, remove your stencil. If you have any sections where the paint bled through the stencil, clean it up using rubbing alcohol and a small paintbrush, carefully removing the excess paint.

With a fine point paint brush, paint the details of the leaves. I will be painting the same details shown on the png files from the listing using yellow for the pale yellow leaves, tangerine for the rose gold leaves, and burgundy for the red. Using a dotting tool, stamp three dots of burgundy paint in the various negative spaces. If you don’t own a dotting tool, you can use the rounded end of the bottom of a paintbrush like I am using.

Results: One Cute Journal!!

And our project is complete! One A5 journal ready for writing in that nice autumn weather.

If you don’t have a cutting machine to complete this project, we are selling the journal already made on our store stargazerlilyboutique.com. You can find the journal through the menu, or search Autumn Leaves A5 Journal.

SUBSCRIBE FOR UPDATES

“Buzzed” Bee Wine Tumbler Tutorial

Today I’m going to show you how to cut and apply our buzzed bee svg design to a wine tumbler! Check out our youtube for more video tutorials in the future.

Step 1: Purchase the Design if you haven’t already

This buzzing bee svg file is available to purchase here for just $4.

Step 2: Set up the file on the cricut design space

Our next step is to upload the design onto the program. To do this, you will need to start a new project, click the upload button, then upload your file onto the design space. Since this file is an svg file, cricut will automatically recognize it as a cut only file. Then simply add your design to the design space.

Now that the file is in the design space, it’s time to weld each of the separate pieces together. The simplest way to do this is to ungroup the image, then click and drag your cursor, selecting one piece at a time and welding them together. I recommend turning off the visibility after each one to prevent accidentally selecting it with the remaining pieces.

Now that the image pieces are welded together, set each piece to the color you plan on cutting. I am using white for the trail, and gold for the remaining pieces. Once that is finished, select all the pieces and group them together. This will make resizing it easier.

If you are using this file on the 12oz wine tumbler, set the height to three inches. If you are planning on using this project again, take the time to save your project.

Proceed with making the project. The cricut design space will automatically sort the pieces to their separate mats.

Step 3: Cut and prep vinyl

Cut the vinyl pieces to the size needed. Since I am only using two colors, I am only using one mat, placing a piece on each side. Now it’s time to cut!

For permanent vinyl, I always set the dial to “custom” and select the “permanent vinyl” setting. 

Now that the pieces are cut, carefully weed out the design. When weeding the trail, I have found it is easier to work without the pliers. Peel back the vinyl, using your fingers to pull down any pieces that may not have been cut correctly. Don’t worry if any of the lines shift, you can straighten them with pliers after. Use pliers to weed out the remaining pieces.

Step 4: Apply Vinyl to your tumbler

Using an alcohol swab, clean the surface of your wine tumbler to remove any dust or grease that may be on the surface and set it aside to dry.

Using transfer vinyl, stick the trail to your wine tumbler. I’ve noticed with cricut vinyl, especially with the white vinyl, it’s difficult to remove the backing. Remember to move slowly, and fold the backing as flat as you can to remove it.

Line up the design onto the tumbler and press down. Don’t worry about the sections over the curved part of the tumbler. Focus on whatever lands on the straighter sides. Once you’ve applied most of the design, go back and place the sections on the curved areas individually. 

Finally, apply the remaining elements. When working with small pieces like this, especially with metallic vinyl, sometimes the transfer vinyl can be too sticky and make it difficult to remove from the vinyl and even leave a sticky residue. If you are having this problem, I recommend using masking tape instead since it is thin enough to see through and easier to remove.

Results: One Adorable Buzzing Bee Tumbler!!

And there you have it! One adorable wine drinking bee on your very own wine tumbler!

If you don’t have a cutting machine to complete this project, we do have the wine tumblers available to purchase already made on our store Stargazer Lily Boutique. It is available in both the black with gold shown in this video, as well as yellow with black.

SUBSCRIBE FOR UPDATES