
Today I’m going to show you how I designed and made this sunflower design on the procreate app, then made a sublimated bag.
FOR THE DESIGN
Procreate app on ipad
Honeybee Spring Procreate Stamp Pack
0r/ Completed “Bee wild & free design”
EQUIPMENT
MATERIALS USED FOR BAG
sublimation print of design (don’t have a sublimation printer? Many etsy sellers sell custom sublimation prints)
Step 1: Download the Stamp Pack
The honeybee spring procreate stamp pack in the video is available to purchase here for just $3. Want the completed design file? Get it here and skip to step 3.
Step 2: Create your design on procreate
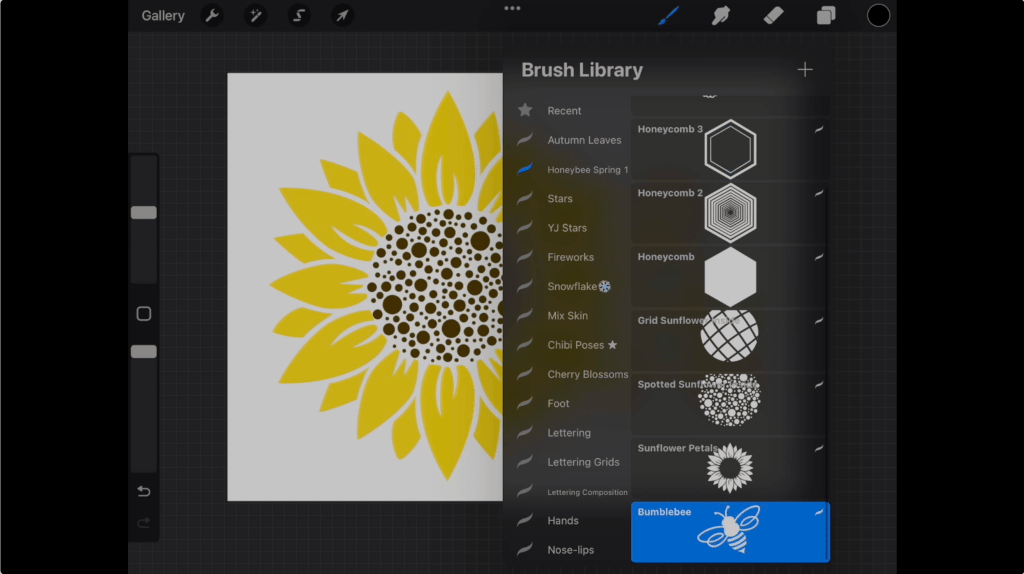
For my design, I knew I wanted a sunflower to be part of the picture so I started by stamping the petals then the center I preferred. I then arranged some of the different honeycomb shapes as well as the honeybees.
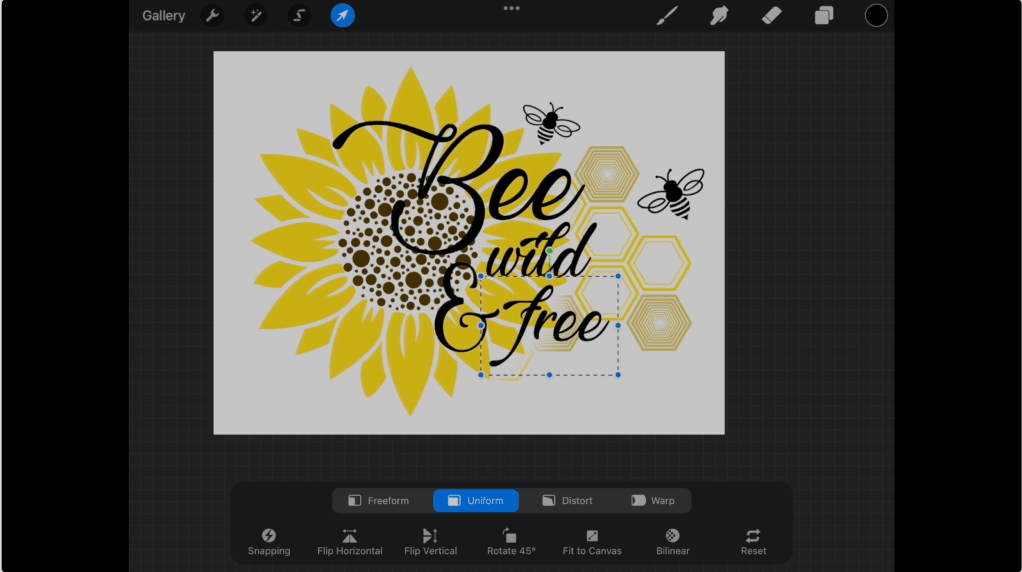
After looking on the internet for different bee pun quotes, I chose my favorite “Bee wild and free” and typed it out. The font I am using in this image is the “Lovely Home” font which I downloaded online. However, the font did not have an and symbol, so I used the “Marchila” font for that instead. The links for both these fonts are in the materials list.

When I placed the font on top of the image, I felt the lettering did not stand out as much as I wanted it to. I fixed this problem by using my eraser to clear a border around the lettering over the sunflower.
Step 3: Print and prep Sublimated Design
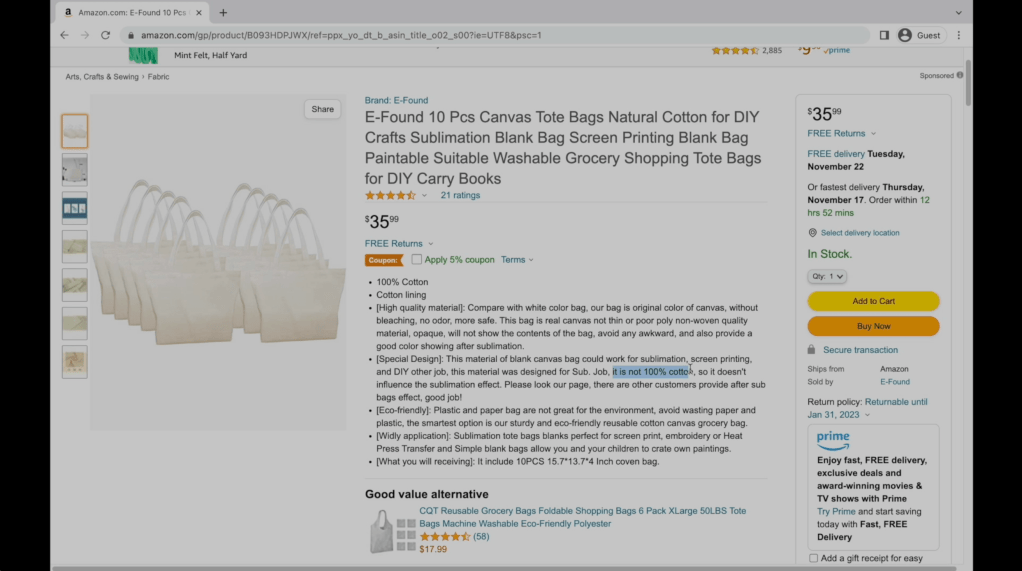
I printed the design using my sublimation printer and purchased a 10 pack of sublimation bags on Amazon. Sublimation items are made of polyester or have a special polyester coating which allows the ink to fuse into the fibers. Sublimation will not work on any material not containing polyester. If you do not have access to a sublimation printer, there are Etsy sellers who sell sublimation transfers.

To apply your sublimation transfer, preheat your heat press to 365 degrees. Lay out your bag and heat it for about ten seconds to prep the surface. This will remove any wrinkles or fold lines from the surface.
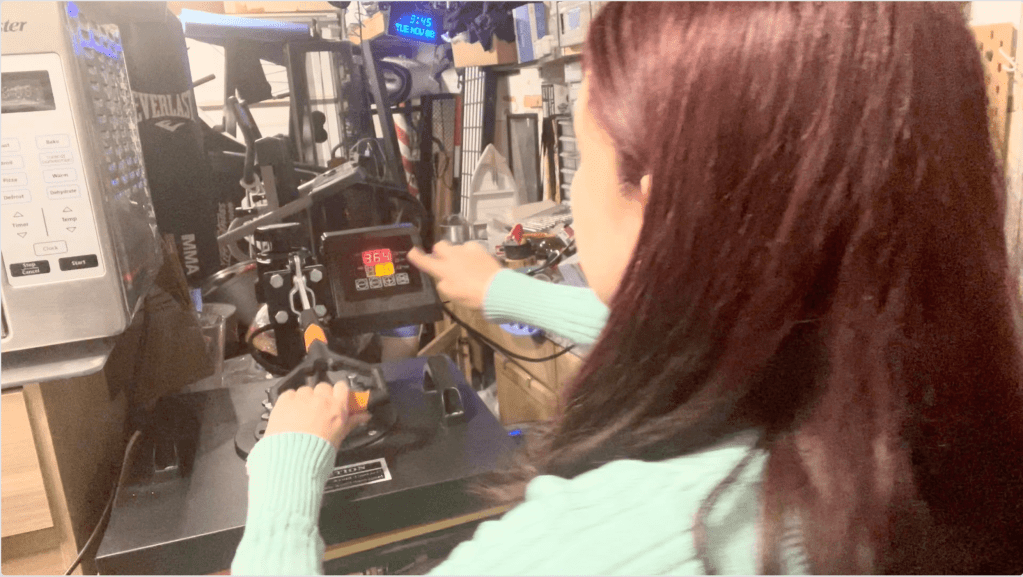
Next, line up the design on the bag and use heat resistant tape to hold the design in place. Place a sheet of parchment paper above the design for extra protection. The amount of time needed will vary depending on your heat press. For my heat press, pressing the design for 80 seconds gave me the best results. Remove the papers to reveal the completed bag!
Results: One Cute Book Bag!!
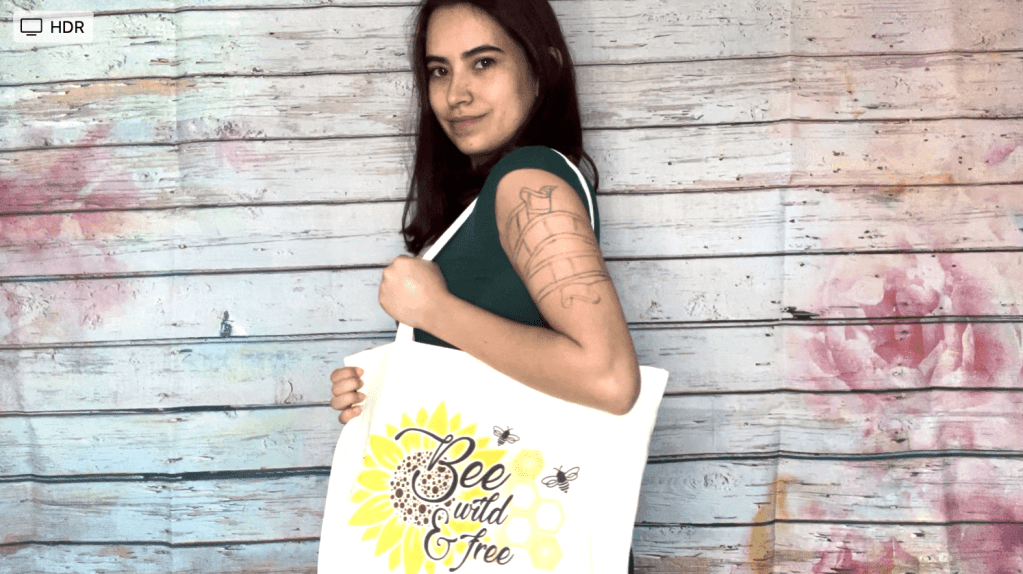
And our project is complete! One adorable spring themed canvas bag.
If you don’t have the equipment or supplies to complete this project, we are selling these bags on our store stargazerlilyboutique.com. However, there are only ten available, so get them while you can!
SUBSCRIBE FOR UPDATES
