
Today I’m going to show you how to cut and apply our buzzed bee svg design to a wine tumbler! Check out our youtube for more video tutorials in the future.
Step 1: Purchase the Design if you haven’t already
This buzzing bee svg file is available to purchase here for just $4.
Step 2: Set up the file on the cricut design space
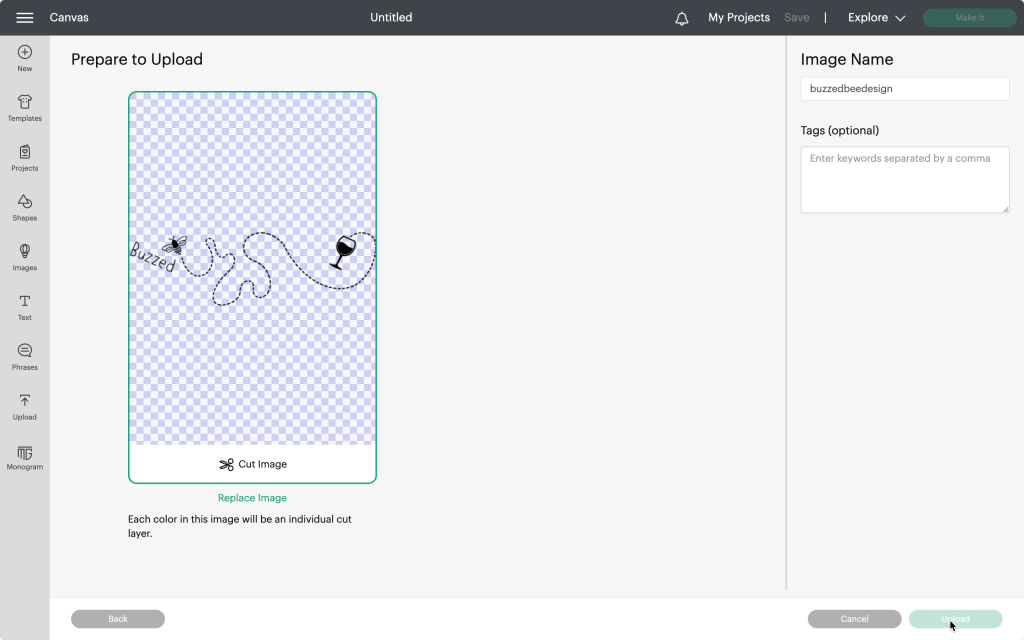
Our next step is to upload the design onto the program. To do this, you will need to start a new project, click the upload button, then upload your file onto the design space. Since this file is an svg file, cricut will automatically recognize it as a cut only file. Then simply add your design to the design space.
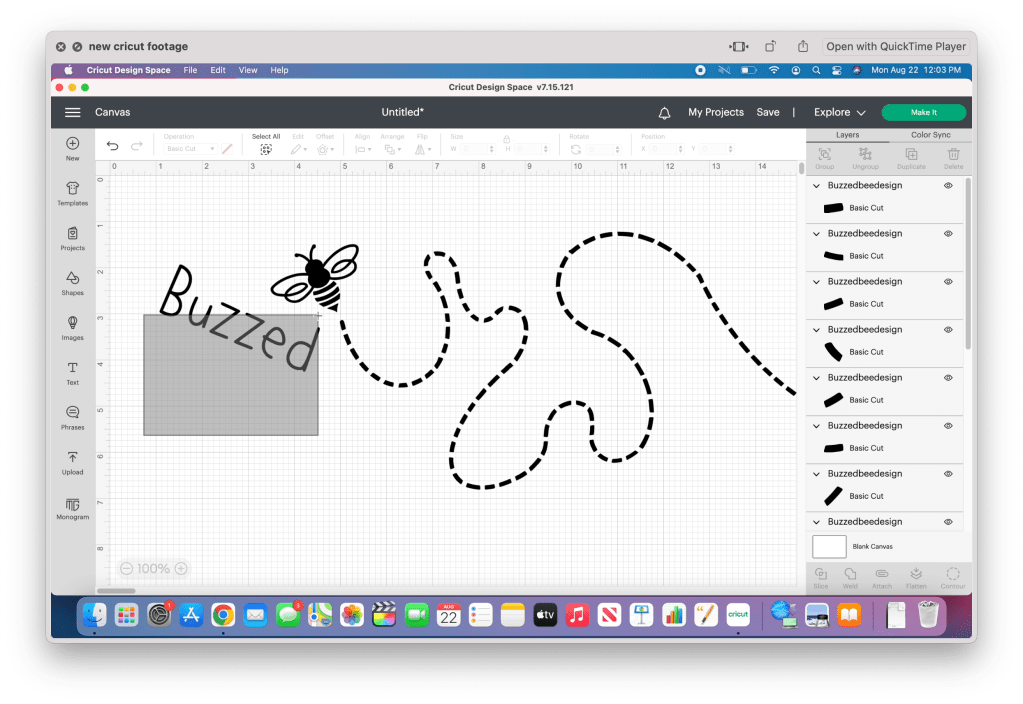
Now that the file is in the design space, it’s time to weld each of the separate pieces together. The simplest way to do this is to ungroup the image, then click and drag your cursor, selecting one piece at a time and welding them together. I recommend turning off the visibility after each one to prevent accidentally selecting it with the remaining pieces.
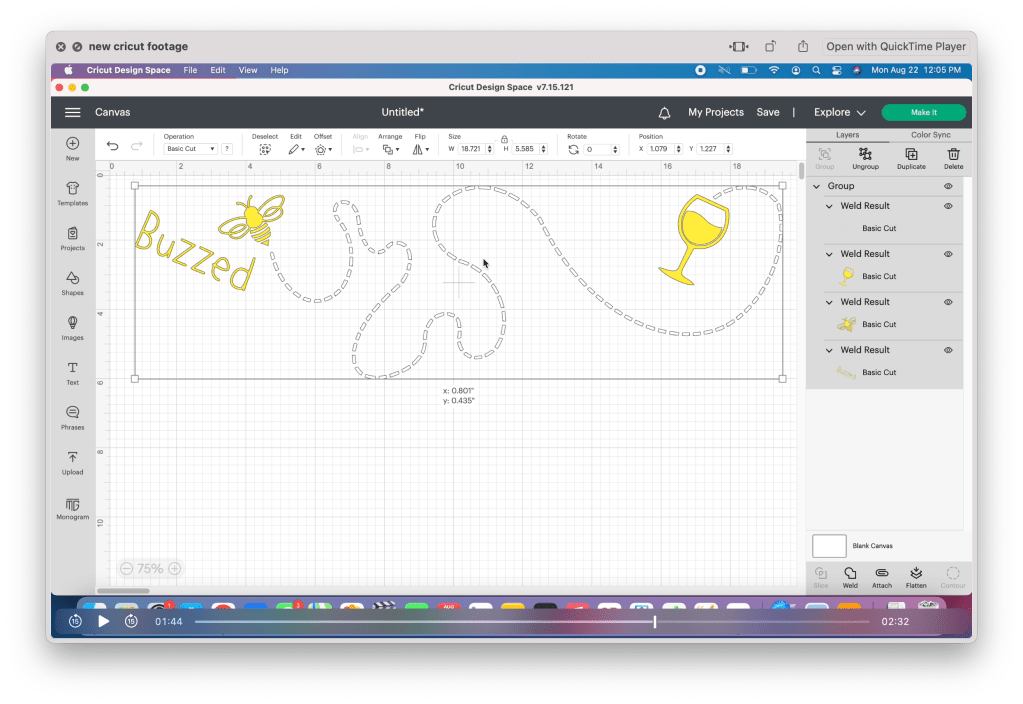
Now that the image pieces are welded together, set each piece to the color you plan on cutting. I am using white for the trail, and gold for the remaining pieces. Once that is finished, select all the pieces and group them together. This will make resizing it easier.
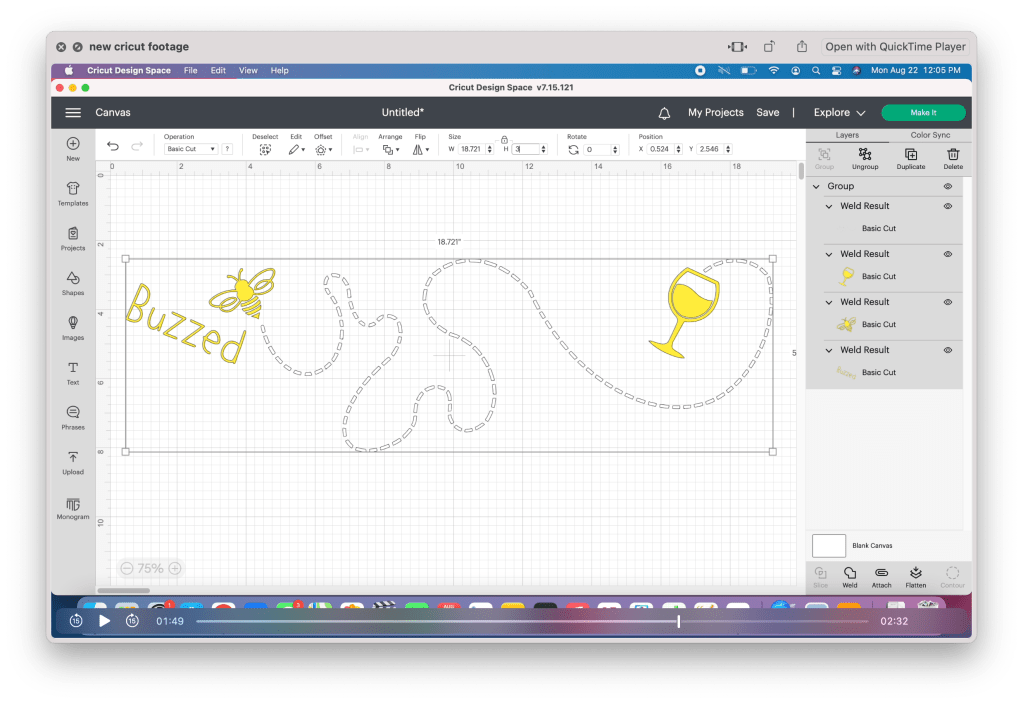
If you are using this file on the 12oz wine tumbler, set the height to three inches. If you are planning on using this project again, take the time to save your project.
Proceed with making the project. The cricut design space will automatically sort the pieces to their separate mats.
Step 3: Cut and prep vinyl

Cut the vinyl pieces to the size needed. Since I am only using two colors, I am only using one mat, placing a piece on each side. Now it’s time to cut!
For permanent vinyl, I always set the dial to “custom” and select the “permanent vinyl” setting.
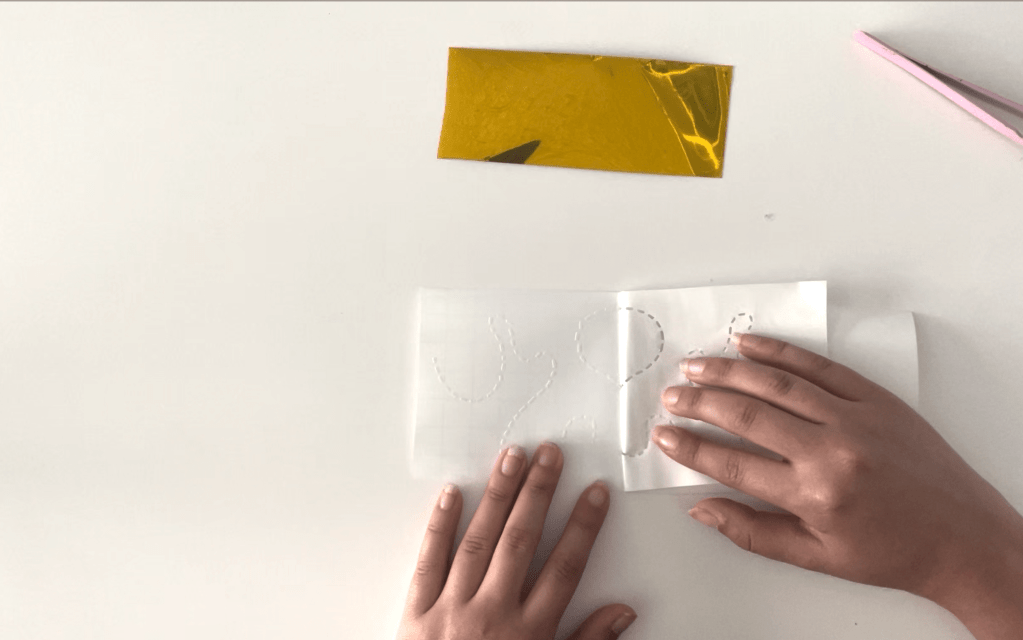
Now that the pieces are cut, carefully weed out the design. When weeding the trail, I have found it is easier to work without the pliers. Peel back the vinyl, using your fingers to pull down any pieces that may not have been cut correctly. Don’t worry if any of the lines shift, you can straighten them with pliers after. Use pliers to weed out the remaining pieces.
Step 4: Apply Vinyl to your tumbler
Using an alcohol swab, clean the surface of your wine tumbler to remove any dust or grease that may be on the surface and set it aside to dry.
Using transfer vinyl, stick the trail to your wine tumbler. I’ve noticed with cricut vinyl, especially with the white vinyl, it’s difficult to remove the backing. Remember to move slowly, and fold the backing as flat as you can to remove it.
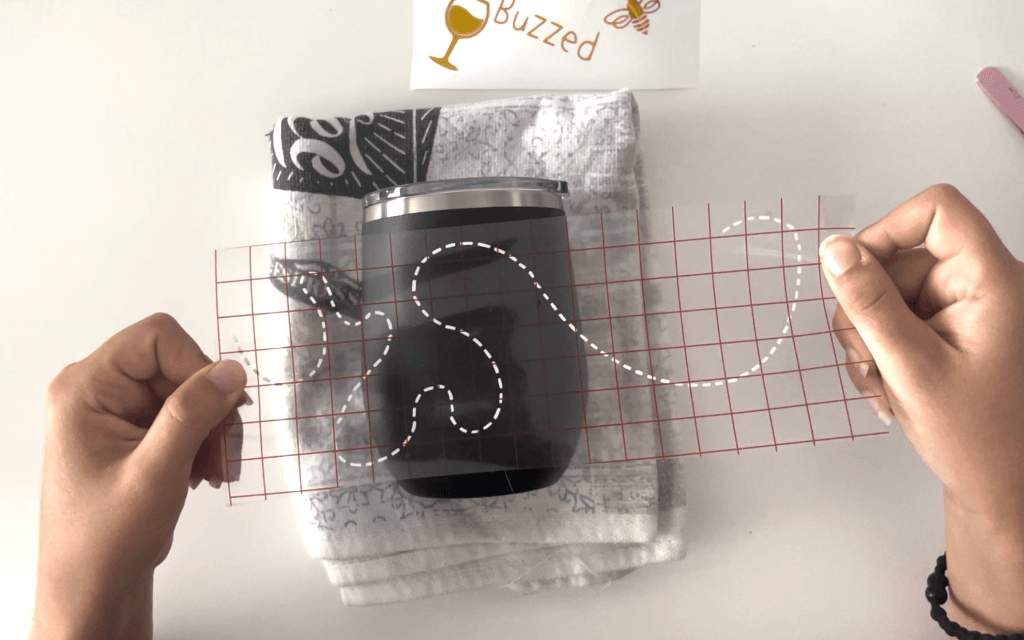
Line up the design onto the tumbler and press down. Don’t worry about the sections over the curved part of the tumbler. Focus on whatever lands on the straighter sides. Once you’ve applied most of the design, go back and place the sections on the curved areas individually.
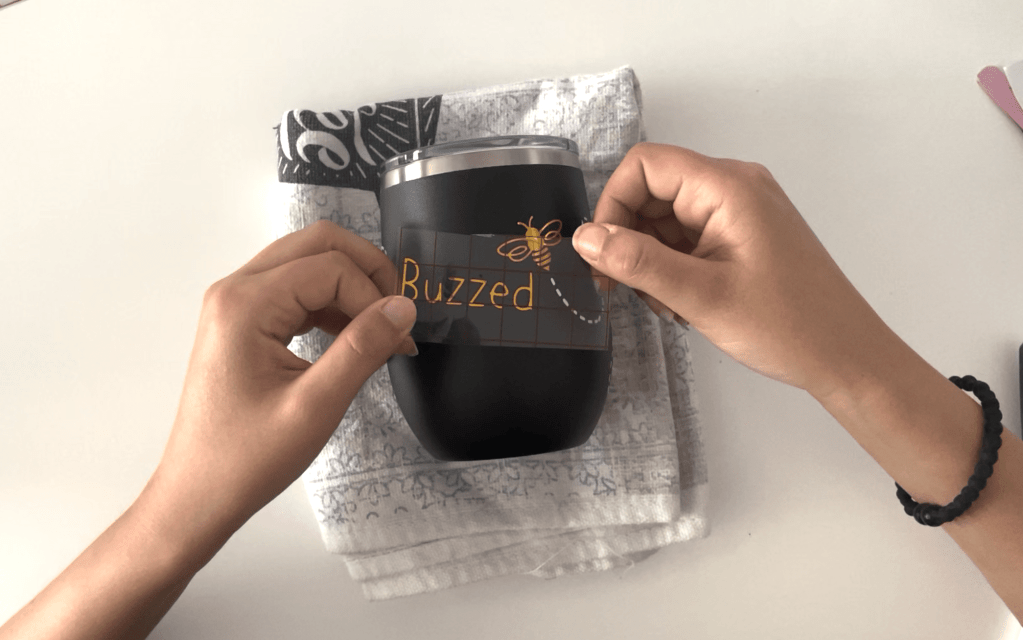
Finally, apply the remaining elements. When working with small pieces like this, especially with metallic vinyl, sometimes the transfer vinyl can be too sticky and make it difficult to remove from the vinyl and even leave a sticky residue. If you are having this problem, I recommend using masking tape instead since it is thin enough to see through and easier to remove.
Results: One Adorable Buzzing Bee Tumbler!!
And there you have it! One adorable wine drinking bee on your very own wine tumbler!
If you don’t have a cutting machine to complete this project, we do have the wine tumblers available to purchase already made on our store Stargazer Lily Boutique. It is available in both the black with gold shown in this video, as well as yellow with black.
SUBSCRIBE FOR UPDATES
